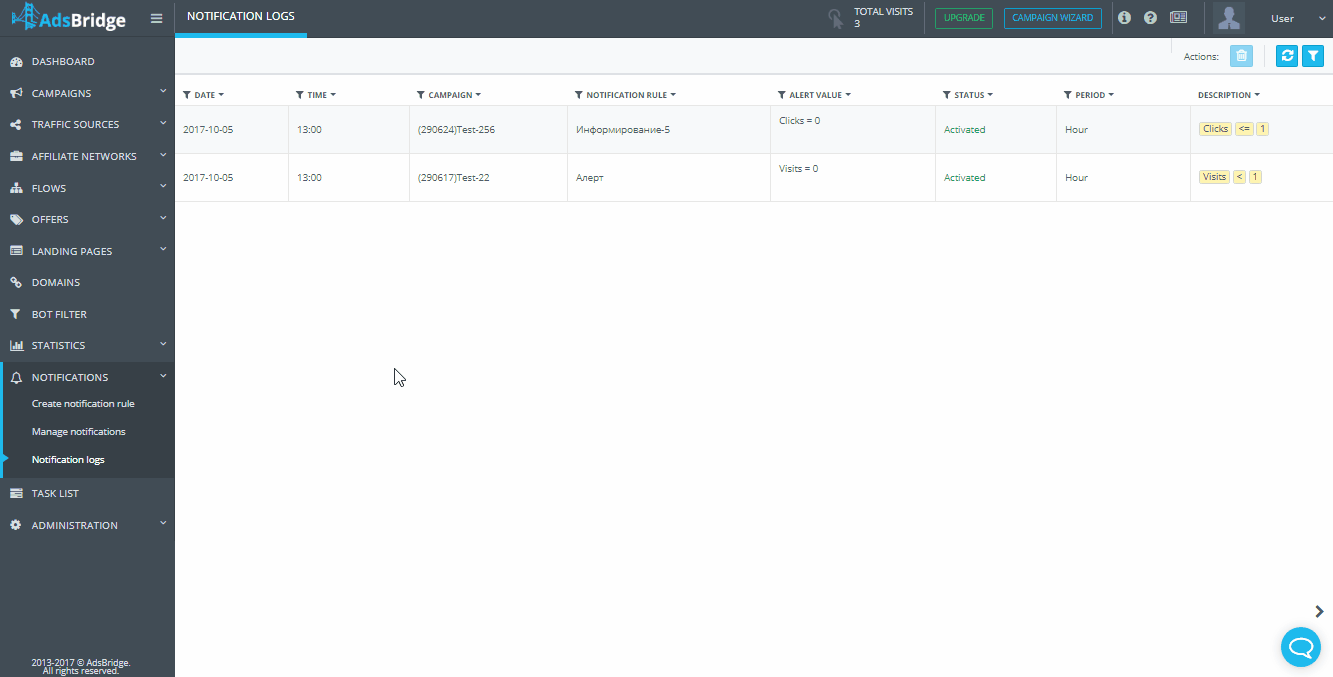
In this section you will be able to see the history of all completed notifications with basic information regarding them. Also, it is possible to filter the log by notification of certain campaigns.
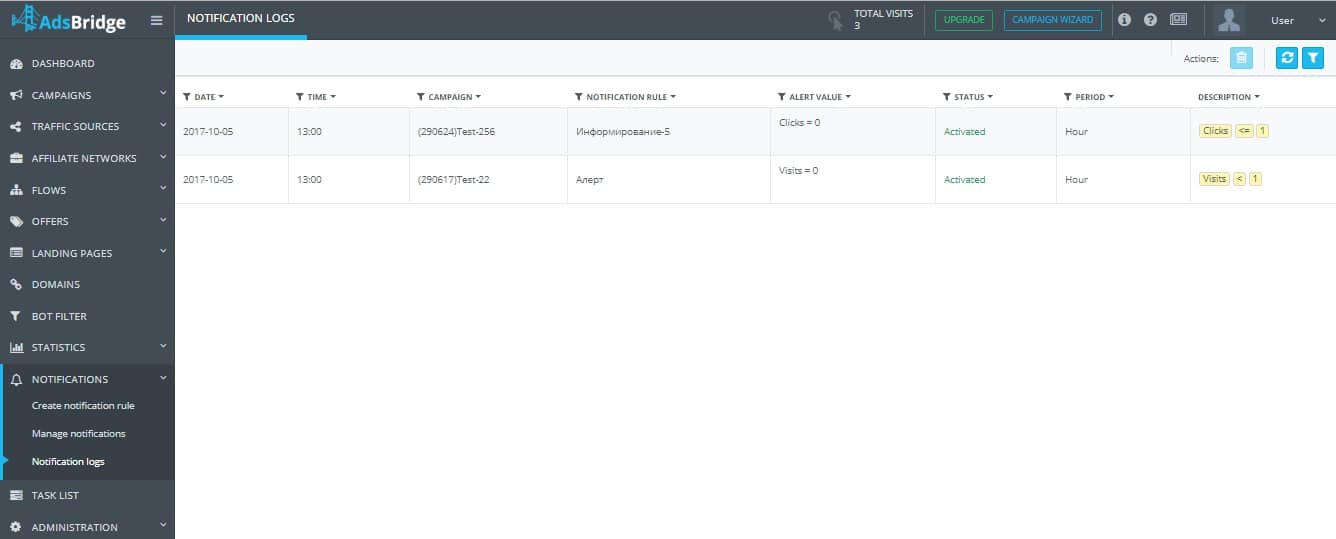
On this page you can find columns with the following information:
“Date” – the date when the notification was processed. Example: 2017-06-08
“Time” – the time when the notification has worked. Example: 00:54
“Campaign” – the name of the campaign that receives the notification. Example: (1111111) Campaign_Name
“Notification Rule” – the name of the notification rule that was executed. Example: Notification_Name
“Alert Value” – the number of events that occurred for a particular campaign for the period specified in the notification condition. Example: Visits = 1000
“Status” – in this column, you can check the status of the notification. For example, if you see visits = 100 in the “alert value” column, and Visits> 1000 in the “description” column, you will see the status “Deactivated”, because the number of visits for the period you specified has not reached the notification condition. Example: Activated
“Period” – the period of time that you specified in the notification settings (Hour / Day / Week / Month)
“Description” – the condition you specified in the notification settings. Example: Visits> = 100
You can also do the following in this section:
“Delete” – deletes the selected entry from the log
“Update” – updates the selected section of the notification log. This option can be useful for checking status change.
“Filters” – with this option you can select a campaign for which you would like to view notifications. You can select all campaigns if desired.
Please note that you can filter by values in columns. To do that, click on the filter icon near the column name, select value and click on “Apply”. If there are too many values in the column, the system will not upload the list automatically. Though, you can find the needed values the same way: enter value and press “Enter”. After that, you will see the checkbox with values. Tick it and press “Apply”.
Note that you can filter out data by several columns at a time. To cancel filtering, you need to click on the filter icon and press “Reset”.
If to click on the arrow icon to the right of the column name, the list will be listed alphabetically (A-Z, Z-A), or by quantity (from high to low and vice versa).