On this page you can see the notification rules you have already created.
You will see the following columns:
“ID” – id of a notification rule in the system.
“Type notification” – campaign or offer.
“Rule name” – a name of a rule.
“Status” – active or inactive.
“Notification” – email, log.
“Period” – the period during which the system checks condition.
“Conditions” – number of conditions in the notification rule. When you click on the value that is displayed in the “Conditions” column, you can see the condition that is set in the rule.
The other options on this page are as follows:
“Activate / Inactive” – becomes active when you select a specific notification rule. This option activates or deactivates the notification rule in the “Actions” menu.
“Edit” – becomes active when you select a specific notification rule. This option redirects to the editing page of the notification rule.
“Copy” – becomes active when you select a specific notification rule. This option allows you to copy the notification rule.
“Delete” – becomes active when you select a specific notification rule. You can delete the notification rule using this button.
“Notes” – becomes active when you select a specific notification. Here, if necessary, you can add any note on the notification. For this, enter text in the bottom field.
The following options are available for text formatting: cancel, repeat, bold, italic, underline, strikethrough. Once you entered the text, press “Apply”, and it will be displayed on the top field. The added note will be shown as an icon near the notification’s name.
The information available on the note is the name of a manager who created it (useful when there is a multi-user access to the account) and date. Moreover, you can edit or delete the note.
Bear in mind that when you copy the notification, the note is not copied.
“Refresh” – will update the information for your notifications.
“Filters” – Here you can select a campaign group and the campaign itself to see a list of created notifications.
Please note that you can filter by values in columns. To do that, click on the filter icon near the column name, select value and click on “Apply”. If there are too many values in the column, the system will not upload the list automatically. Though, you can find the needed values the same way: enter value and press “Enter”. After that, you will see the checkbox with values. Tick it and press “Apply”.
Note that you can filter out data by several columns at a time. To cancel filtering, you need to click on the filter icon and press “Reset”.
If to click on the arrow icon to the right of the column name, the list will be listed alphabetically (A-Z, Z-A), or by quantity (from high to low and vice versa).
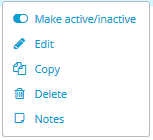
Also, if to right-click on the line with a specific notification, you will see the menu with a list of actions: Make active/inactive, Edit, Copy, Delete, Notes.