This section consists of two tabs for managing conversions: “Upload conversions” and “Update conversions”.
“Upload conversions” tab.
In this section, you can manually upload conversions by entering click ID. These might be conversions that were missed by tracking pixels or the ones that were not passed to AdsBridge by any other reason (e.g., the correct offer setup but incorrect postback setup, or inability to pass postback with information about conversion from the side of affiliate network).
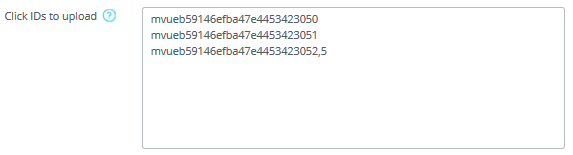
Click ID should be entered in the following format (separated by a comma without spaces):
Click ID, payout, txid, status.
Note that the payout must be an integer or decimal number with a period and not more than 4 characters after it.
Examples:
mvueb59146efba47e4453423050 (for click ID)
mvueb59146efba47e4453423050,5 (for click ID and payout),
mvueb59146efba47e4453423050,5,payment (for click ID, payout and txid),
mvueb59146efba47e4453423050,5,payment,approved (for click ID, payout, txid and status).
If you want to add status to conversion for CPA offer (without txid), the format will be as follows:
mvueb59146efba47e4453423050,,,approved or
mvueb59146efba47e4453423050,5,,approved.
The combination of click ID, payout, txid (for CPS offers), and status is entered one by one in a line.
The following actions are available in this section:
“Clear list” – completely clears the entry field after pressing it.
“Upload” – activates the conversions upload.
Please note that manually uploaded conversions are displayed with the exact time and date of their upload. However, there is an option on AdsBridge that lets you display conversion by click time. If this option is more convenient for you, please contact your account manager with a request to enable this functionality.
Bear in mind that the new logic of conversions’ distribution starts working right after this option is enabled on the account, and it will be applied to all your campaigns.
“Upload conversions” tab.
In this section, you can manually change conversions that are not older than 30 days.
Click ID of conversions with incorrect data should be entered in the following format (separated by a comma without spaces): click ID, payout, txid, status.
Note that the payout must be an integer or decimal number with a period and not more than 4 characters after it.
Examples:
ortln592fe4482318f538555813,5 (for click ID and payout),
ortln592fe4482318f538555813,5,payment (for click ID, payout and txid),
ortln592fe4482318f538555813,5,payment,approved (for click ID, payout, txid and status).
If you want to add status to conversion for CPA offer (without txid), the format will be as follows:
ortln592fe4482318f538555813,,,approved or
ortln592fe4482318f538555813,5,,approved.
The combination of click ID, payout, txid (for CPS offers), and status is entered one by one in a line.

The following actions are available in this section:
“Clear list” – completely clears the entry field after pressing it.
“Upload” – activates the conversions upload.
After clicking on the “Update” button, the task for conversions’ update is placed in the “Task list”. You will see the new window with a question, enabling you to move straight to the “Task list” section.
Please note that if any of the conditions necessary to edit conversions is not met, you will see the error and its reason in the error report. You can find such a report in the “Task list” section after processing the task (with the “Complete” status). The link to error report will be added to the “Description” column.
Also, the information about conversions is updated only on the tracker. If you pass conversions to the traffic source’s side, the information about conversion that has already passed won’t be updated on the side of a traffic source.