On this page, you can create an affiliate network or choose one from the list of templates. Let’s go through the elements on this page.
“Affiliate networks templates” – this option allows you to add popular affiliate networks. After clicking on this button, you’ll see the pop-up with a list of affiliate networks.

Please note that some affiliate networks in this list are marked as Integrated. If you add an integrated affiliate network, you can link your account on this affiliate network with AdsBridge account, and add its offers.
All affiliate networks in the list of templates are preset. This means that after adding it, you will see a preset postback URL that you need to place on the side on an affiliate network, preset token, and for some affiliate networks – the preset conversion status.
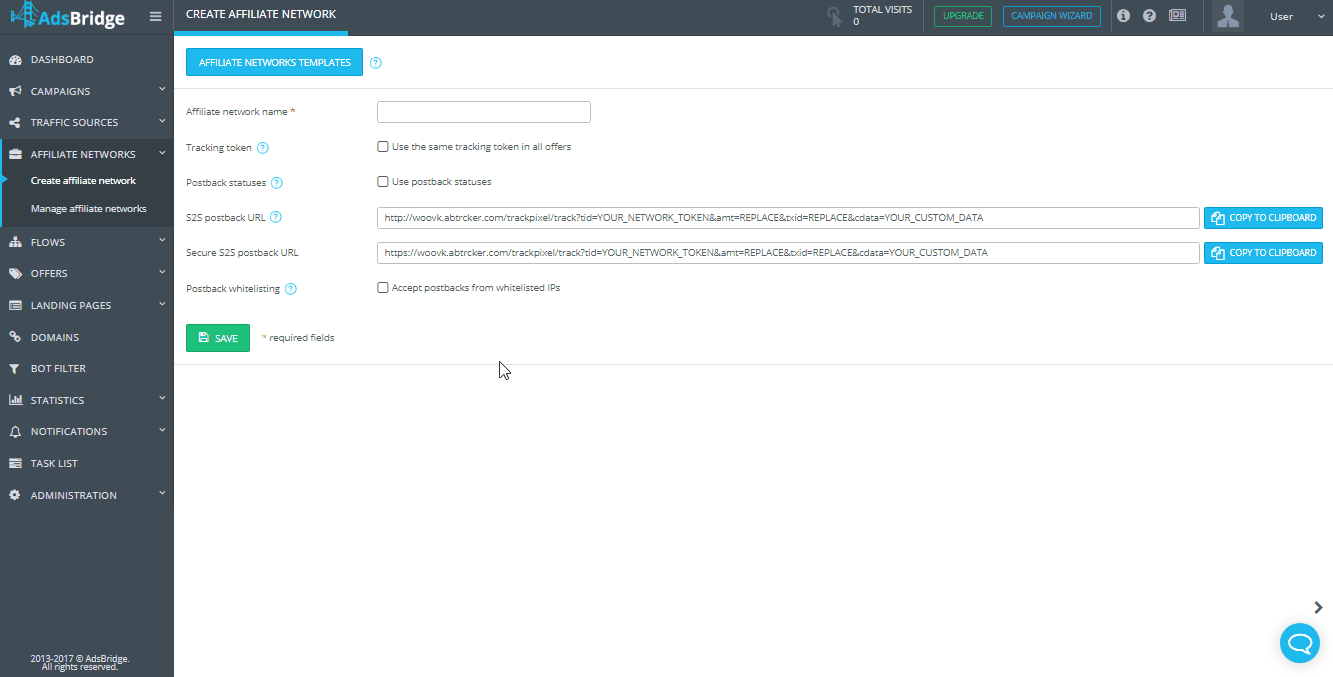
“Affiliate network name” is a mandatory field. Here, you need to specify the name of your affiliate network so that later you can find it in the system faster and view statistics on it. If you choose a preset affiliate network from templates, this field will be filled automatically. You cannot use one and the same affiliate network name twice but you can create a copy of an affiliate network and add additional symbol to its name. You can also save affiliate network with the name, which is already listed in the affiliate network templates. We recommend you to use these templates since their setup was already tested and proved to be correct. If you do not use an affiliate network but track conversions on your own website, you can create an affiliate network with the name of your website. You need this to view the statistics on this website in the “Statistics” section by affiliate networks,
and in order to have access to such an option as the conversion status, if necessary, because you can track conversions with the status on your own website.
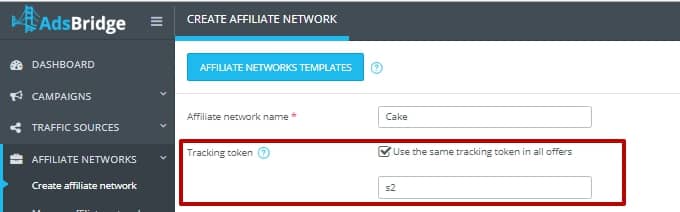
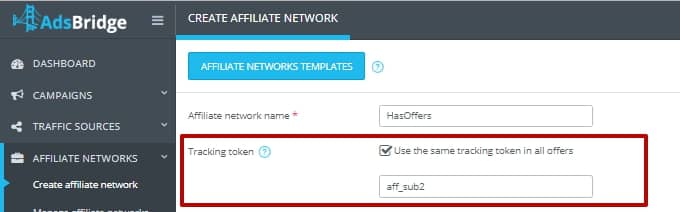
“Tracking token” – tick the “Use the same tracking token in all offers” checkbox and enter the name of your affiliate network parameter that can pass the dynamic values. This parameter will be inserted in the “Tacking token” field in all offers that use this affiliate network. Unique click ID, generated by AdsBridge will be passed to your affiliate network in this parameter. If your affiliate network uses platform Cake, insert s2 (s3,s4,s5).
If it uses HasOffers, insert aff_sub (aff_sub2, aff_sub3, aff_sub4, aff_sub5).
If your affiliate network uses a different platform, you can see the name of the parameter from representatives of this affiliate network. This field is not mandatory for all affiliate networks, because some of them have peculiarities in the settings, due to which this field in the AdsBridge settings should be left blank. You can find more information in the “Offer” section.
“Postback statuses” – by ticking the “Use postback statuses” checkbox, you can pass the conversions status in the postback by offers that belong to this affiliate network. With ticked checkbox here, you will see the “Approved status value” field.
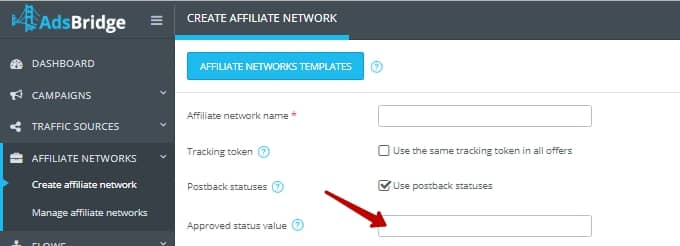
In this field, you need to enter the approved status value. Conversions with this status in the postback will be displayed on the Dashboard, in the manage sections and in the “Global report” tab in the statistics. Conversion with a different status will be displayed only in the “Conversion report” section.
“S2S postback URL” – this field is created for the convenience of using the platform. In case of using the affiliate network template, copy the S2S postback URL and paste it into the corresponding field in the account on the affiliate network side. If you create an affiliate network from scratch, in this field you can insert an S2S postback URL set for this affiliate network. This setting is optional. When you click the “Copy to clipboard” button, the postback will be automatically copied to the clipboard. More information about postback can be found in the “Tracking Pixels” in the User Menu.
“Secure S2S postback URL” – this field is created for the convenience of using the platform. Secure S2S postback was created specifically for use on affiliate networks that accept only such postback. You can check with representatives of the affiliate network which version of postback you need to use. In the preset affiliate network template, copy the S2S postback link and paste it into the corresponding field in the account on the affiliate network side. If you create an affiliate network from scratch, in this field you can insert the S2S postback link set for this affiliate network. This setting is optional. When you click on the “Copy to clipboard” button, the postback will be automatically copied to the clipboard. More information about postback can be found in the “Tracking Pixels” section in the User Menu.
“Postback whitelisting” – if to tick the “Accept postback from whitelisted IPs” checkbox for this affiliate network, the AdsBridge system will accept postbacks only with IPs specified in this field. Postbacks from other IP addresses won’t be accepted.
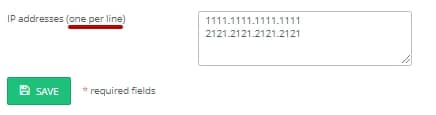
“IP addresses (one per line)” – this field will open when you tick the “Accept postback from whitelisted IPs” checkbox. Here you can enter all IP addresses, from which AdsBridge will accept postbacks. The filling format is 1111.1111.1111.1111.
Please note that currently, there is no possibility to add ranges.
After filling all the required fields, click “Save”. Further, the affiliate network will be available on the “Manage affiliate networks” page.
Please note that if you create your own site as an affiliate network, you need to use the tracking pixels on the “Thank you” page instead of S2S postback if you do not have the option to use postback. More information can be found on the “Tracking Pixels” page.