Do you know any affiliate who has not heard about Shopify? Today it is a leading platform that helps to create your online store even without experience.
In essence, Shopify looks like a kind of designer. There are a number of plugins that can be installed – timer, pop-up, discounts, etc. The global idea of the platform is to make your commerce as simple and effective as possible.
Today, our team wants to help you with the setup to simplify your work.
Working with the Shopify platform, you can send a user to your store’s page or to a single product from various sources and channels. Using the AdsBridge tracker, you get the most detailed statistics for each traffic source, store, products in various sections, which makes it possible to optimize advertising effectively and maximize monetization of your store/products.
To track statistics of all visits and conversions through the tracker, you need to direct users to the AdsBridge campaign link, and not directly to the Shopify link.
Shopify does not allow you to manually add scripts to its pages, so you cannot use the “Without redirect” scheme when working with Shopify. Pay attention to this, when working with traffic sources such as Facebook or Google, they often block redirects.
How does it work?
- User clicks on AdsBridge campaign link
- It automatically redirects to the store / product page (it depends on your settings). Each link to Shopify product in AdsBridge is added as a separate offer.
- After purchasing the product, on the Shopify side AdsBridge pixel works out transferring the conversion / purchase to the tracker.
Let’s consider the step-by-step configuration of tracking Shopify products through AdsBridge.
1.Set up an AdsBridge pixel to transfer conversions from Shopify to the tracker.
Go to the “Tracking Pixel” section
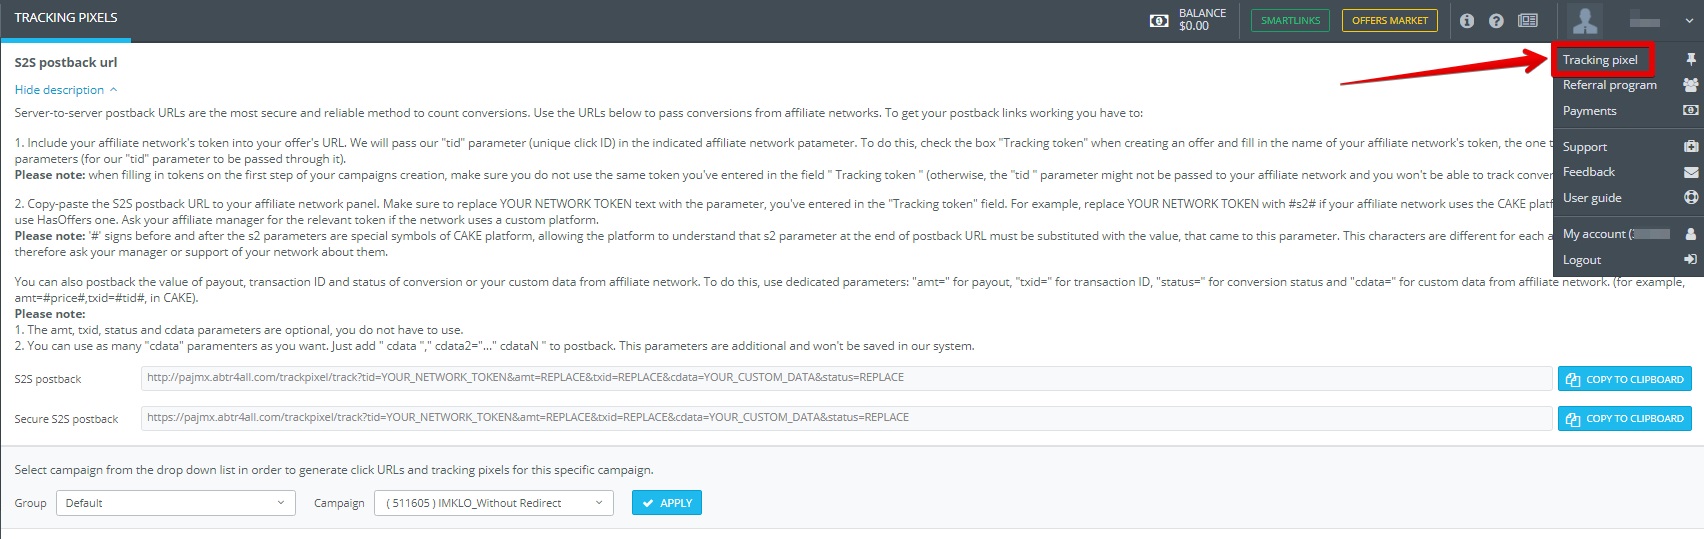
Copy Image pixel

Next, add Shopify macros to this pixel.
Source pixel:
<img style=”display: none;” src=”https://your_domain_adsbridge.com/trackpixel/track.jpg?tid=YOUR_NETWORK_TOKEN&amt=REPLACE&txid=REPLACE&status=REPLACE”>
- Delete tid=YOUR_NETWORK_TOKEN and status=REPLACE
- Change payout value amt=REPLACE for amt= {{ total_price | money_without_currency }}
- Change value txid=REPLACE for txid={{ order_number }}
Please note! The domain used in the pixel must match the domain used in your campaigns. Your AdsBridge system domain is specified by default, but if you use your own domain for advertising, remember to change it in pixel.
* Read more about Shopify macros here – https://help.shopify.com/en/manual/orders/status-tracking/customize-order-status/add-conversion-tracking
The final pixel should look like this:
<img style=”display: none;” src=”https://your_domain_adsbridge.com/trackpixel/track.jpg?amt={{ total_price | money_without_currency }}&txid={{ order_number }}”>
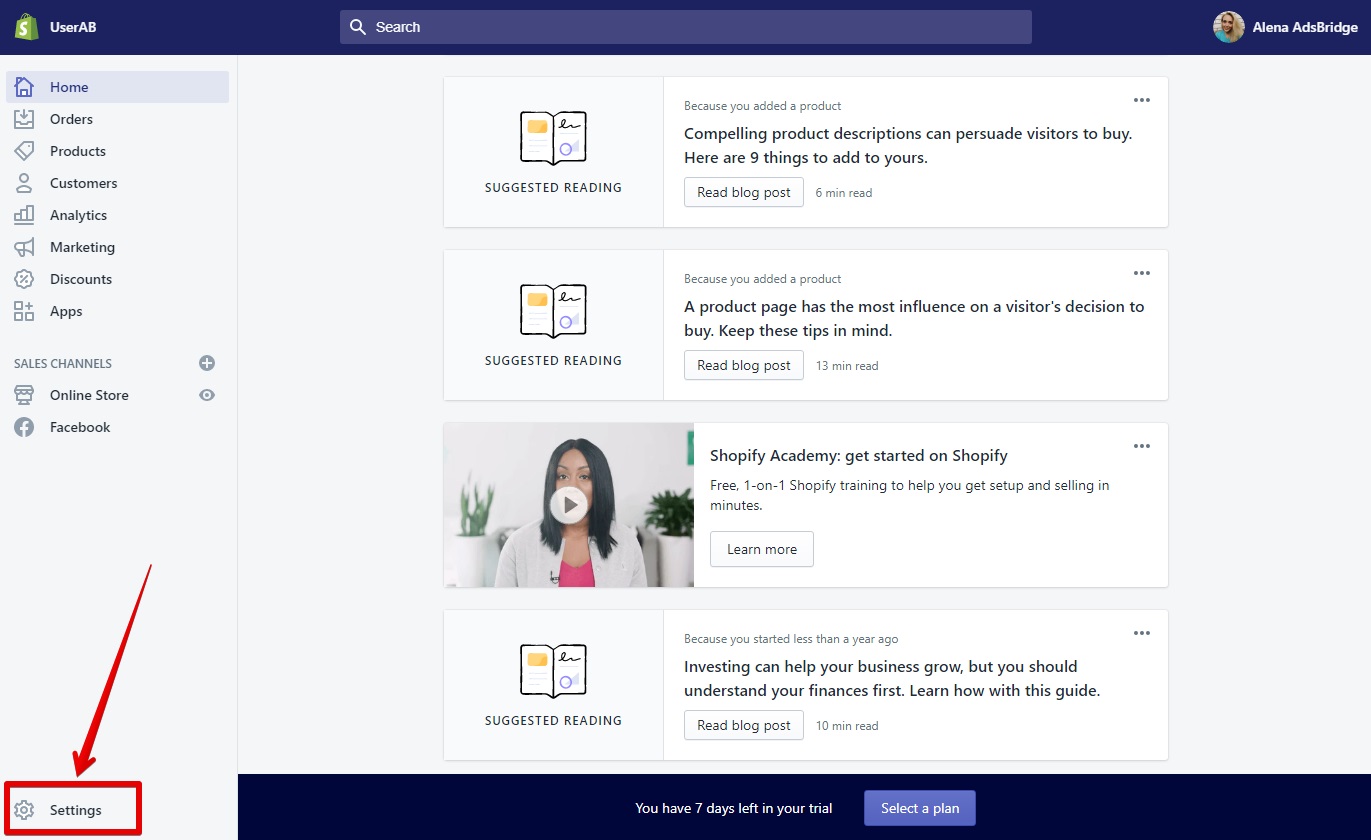
2.Adding conversions tracking pixel to the Shopify page
Go to the “Settings” section –
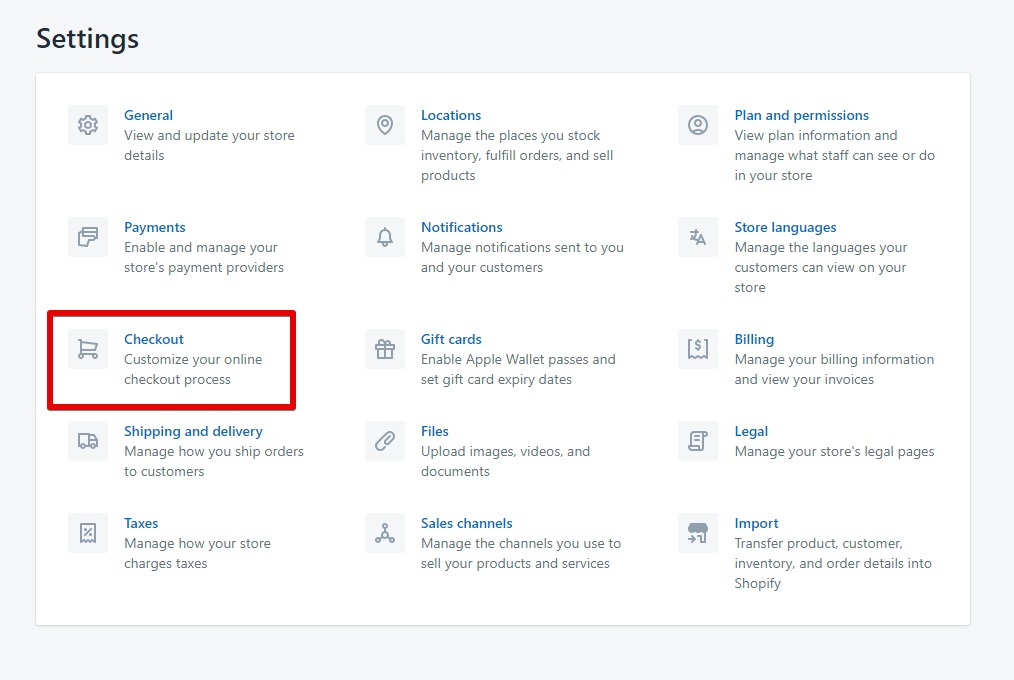
Choose the “Checkout” category.
Next, scroll down to the “Order processing” section and in the “Additional scripts” field add the changed pixel for conversion tracking that was received on AdsBridge.
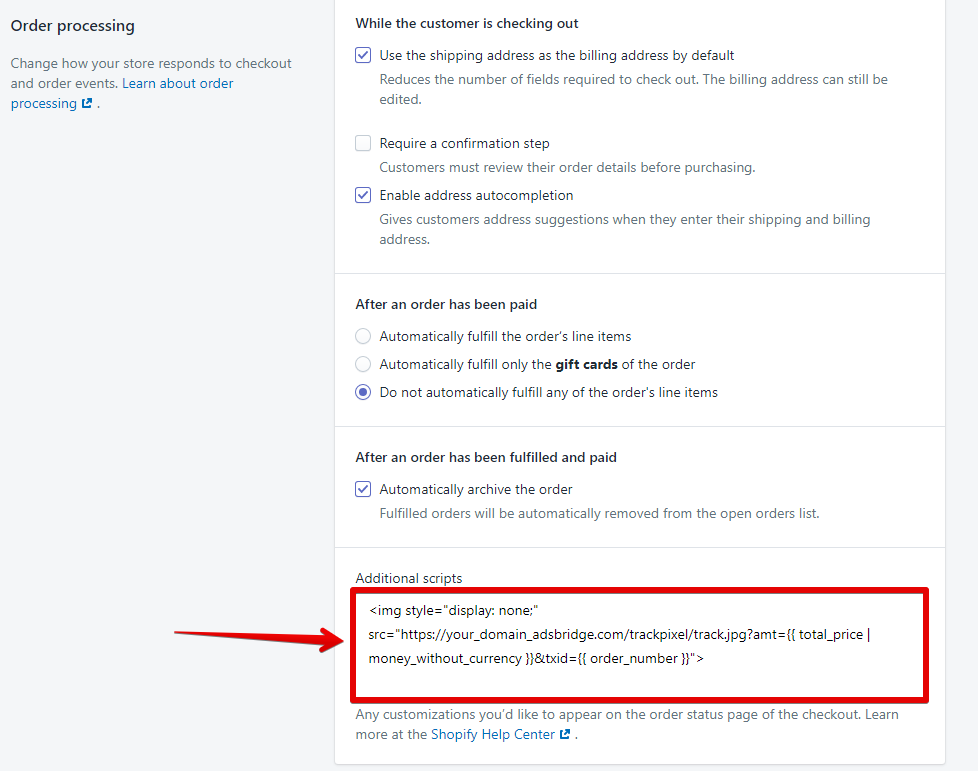
Click “Save” button.
3.Add Shopify Products as Offers on AdsBridge.
On the AdsBridge side, you need to create offers with links to Shopify products. For this:
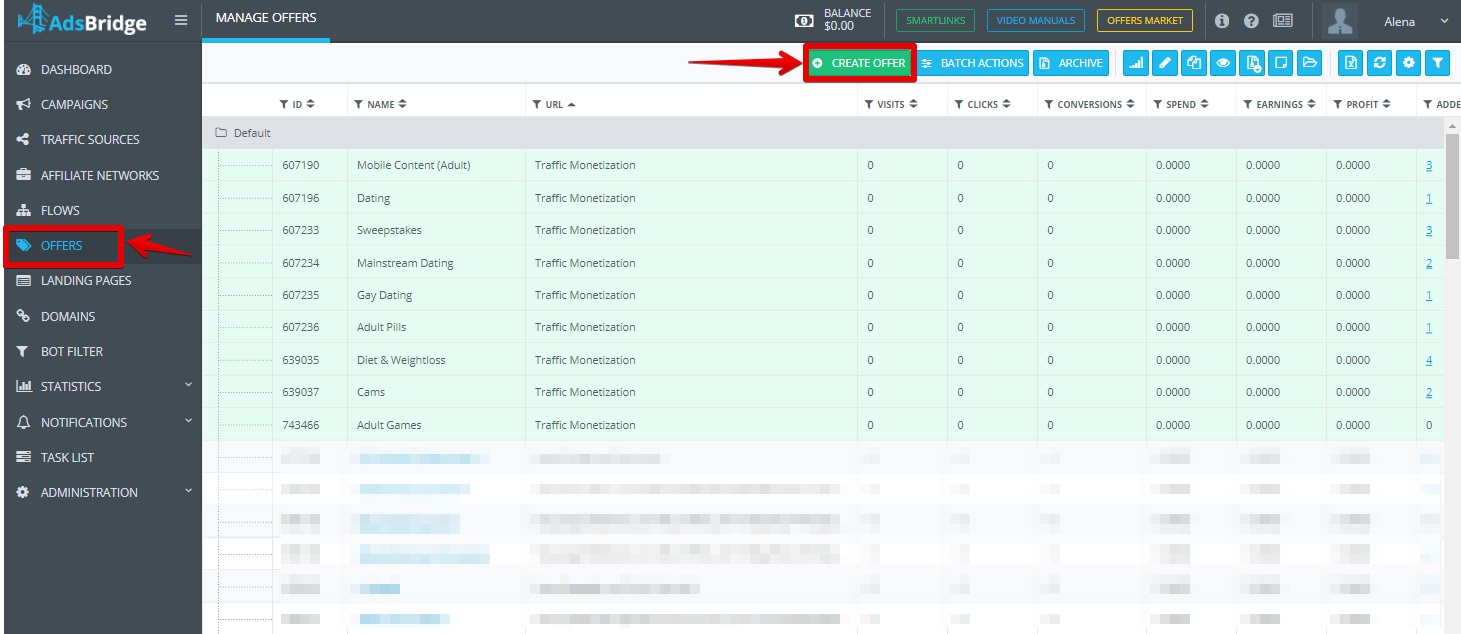
- In AdsBridge, go to the page “Offers” – “Create Offer”.
- Select the offer vertical
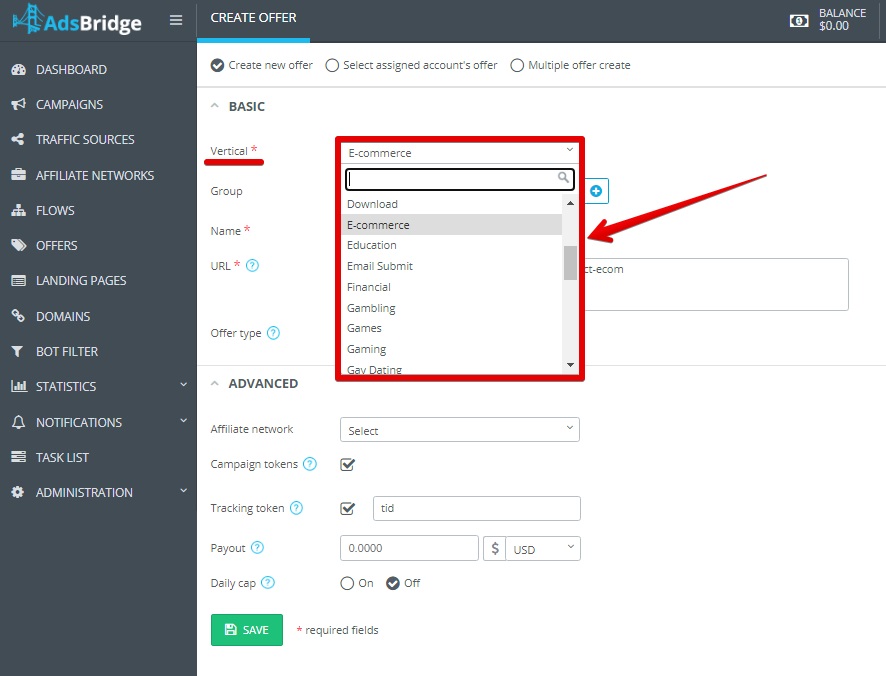
- For ease of use, you can create a group or choose from existing ones.
- In the “Name” field, enter the name of the product.
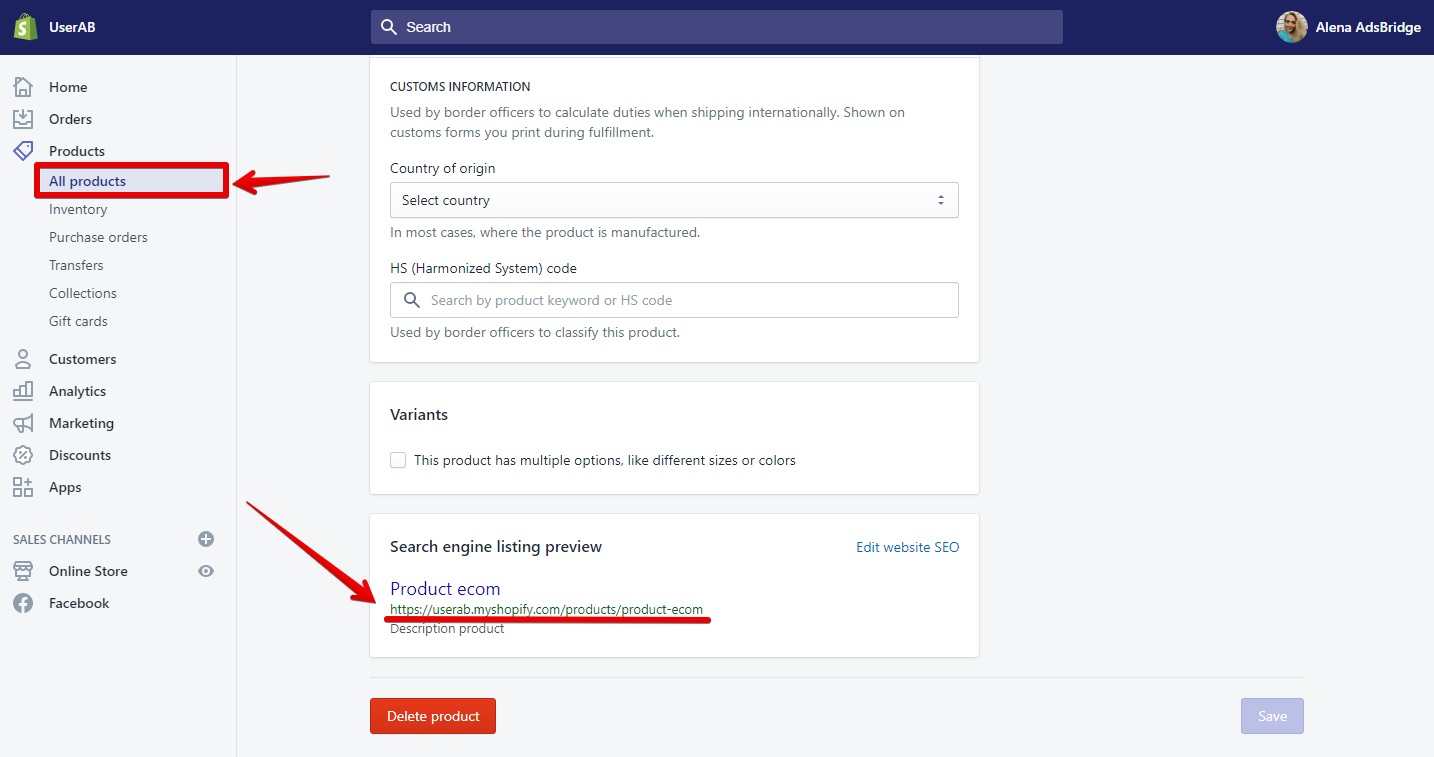
- In the “URL” field, specify the link to the product taken on the Shopify side.
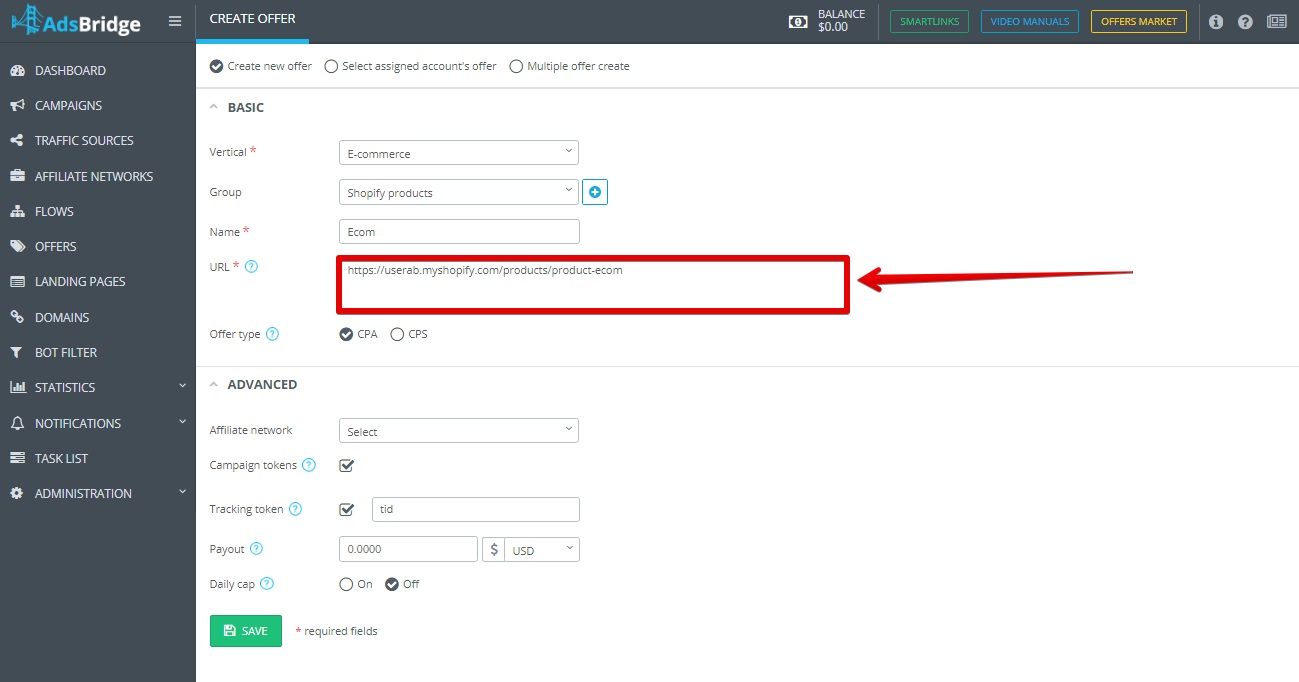
- Leave the advanced settings by default.
Click the “Save” button.
Add the rest of the products as described above. Once all Shopify products are created in AdsBridge, you can configure various funnels, conduct A/B tests, view detailed statistics in different sections, optimize traffic and distribute it for more efficient monetization.
Still have any questions? Write to your account manager, we are always happy to help?