
Sup guys?!
We decided to remind you about one of our unique and mega useful function – Organic traffic tracking.
This functionality allows you to send traffic without redirects, but at the same time get the information via tokens for distribution inside a tracker.
This information will be useful if you use such traffic sources as AdWords, Facebook, Mytarget, Yandex and so on. These traffic sources categorically prohibit redirects and can ban your link right away. But with our scheme for organic traffic tracking there is nothing to worry about.
Why is it necessary?
– If the transition to the landing page is made without redirect to the tracker, as a rule, it has a positive effect that leads to CTR and conversion increase.
– It lets you work with traffic sources that do not recommend using redirects in your ad campaigns (AdWords, Facebook, MyTarget).
– You can estimate how many conversions the traffic brings to your website from different offers, broken down by various metrics.
How to do it
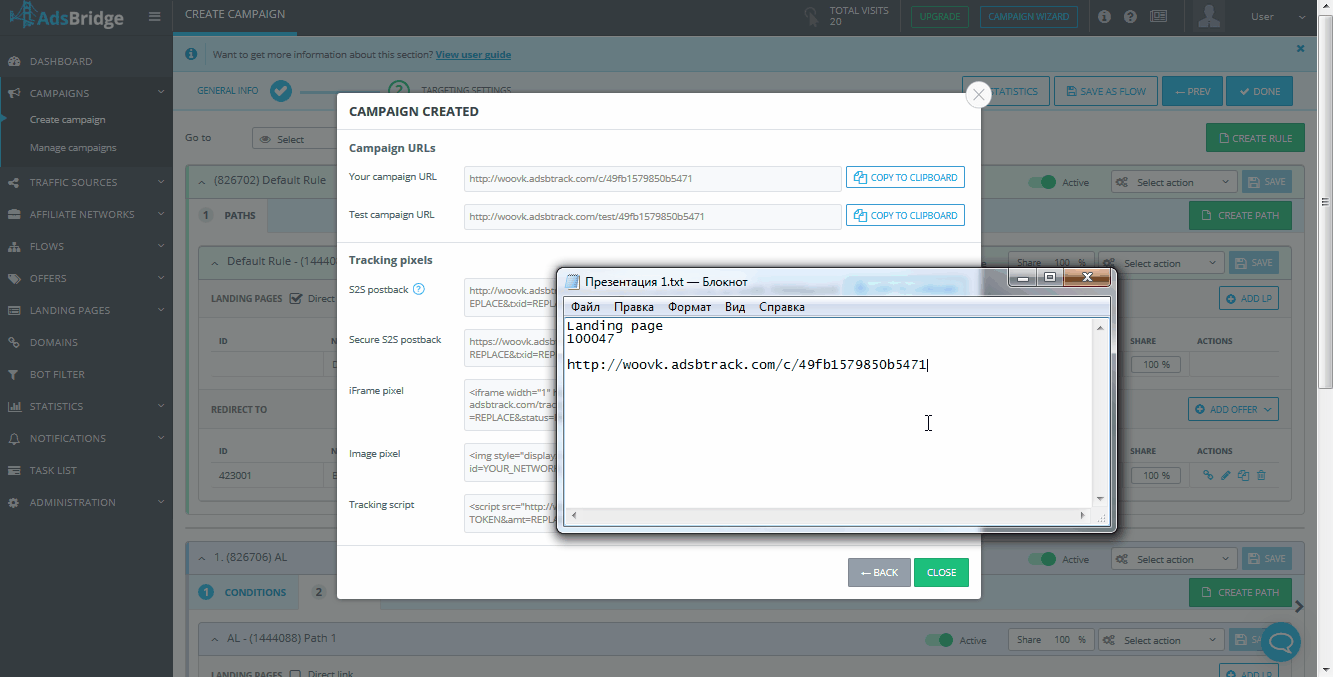
1) Go to AdsBridge. Create a campaign. On the first step with “General info”, we fill in all the necessary information and save the settings. Then, we move on to the second step, “Targeting settings”. We add a rule, and on the “Conditions” tab set the parameter for distribution, if needed. Then, we go to “Paths” and add a landing page and offer. We remember the ID of a specified landing page (e.g. ID 100047) and save the campaign URL (e.g. http://woovk.adsbtrack.com/с/49fb1579850b5471).
The statistics by the given landing page will be recorded in this campaign.
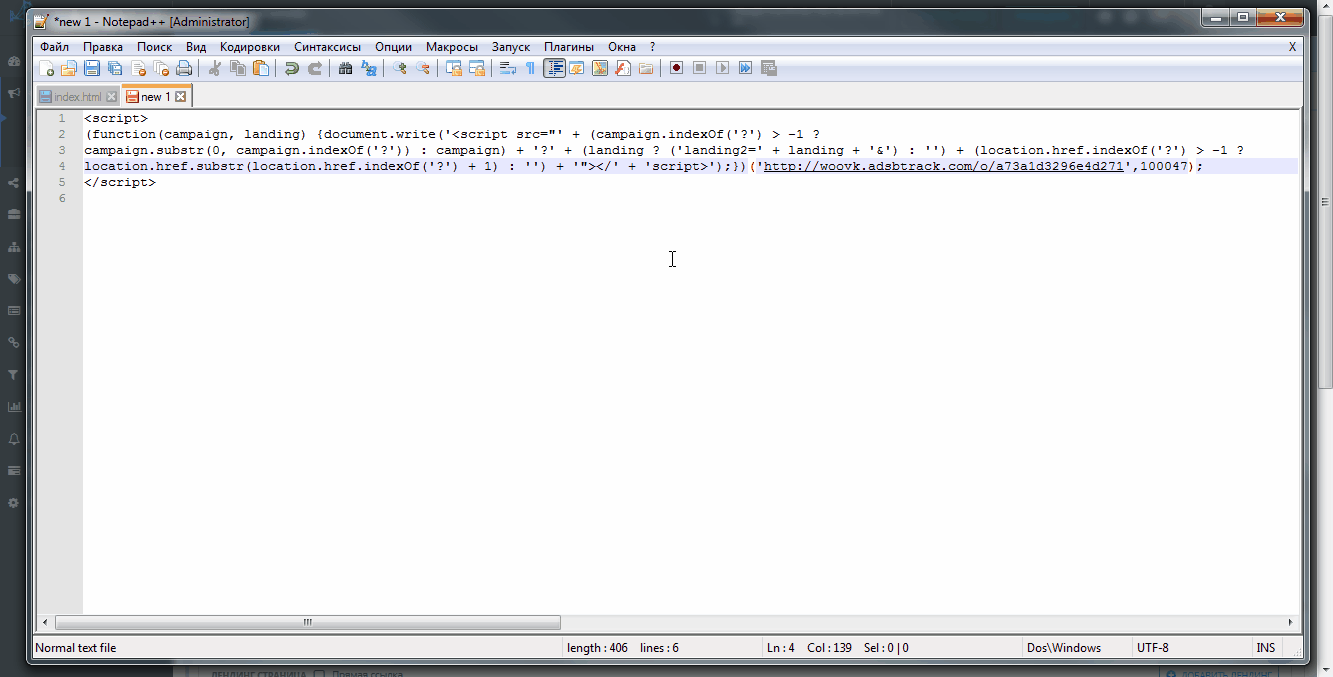
2) In the campaign URL we replace /c/ after http://woovk.adsbtrack.com with /o/. Based on our example, we end up with the following link: http://woovk.adsbtrack.com/o/49fb1579850b5471
3) We take a special script from AdsBridge and paste the changed link of our campaign into it. As a result, it should look like this:

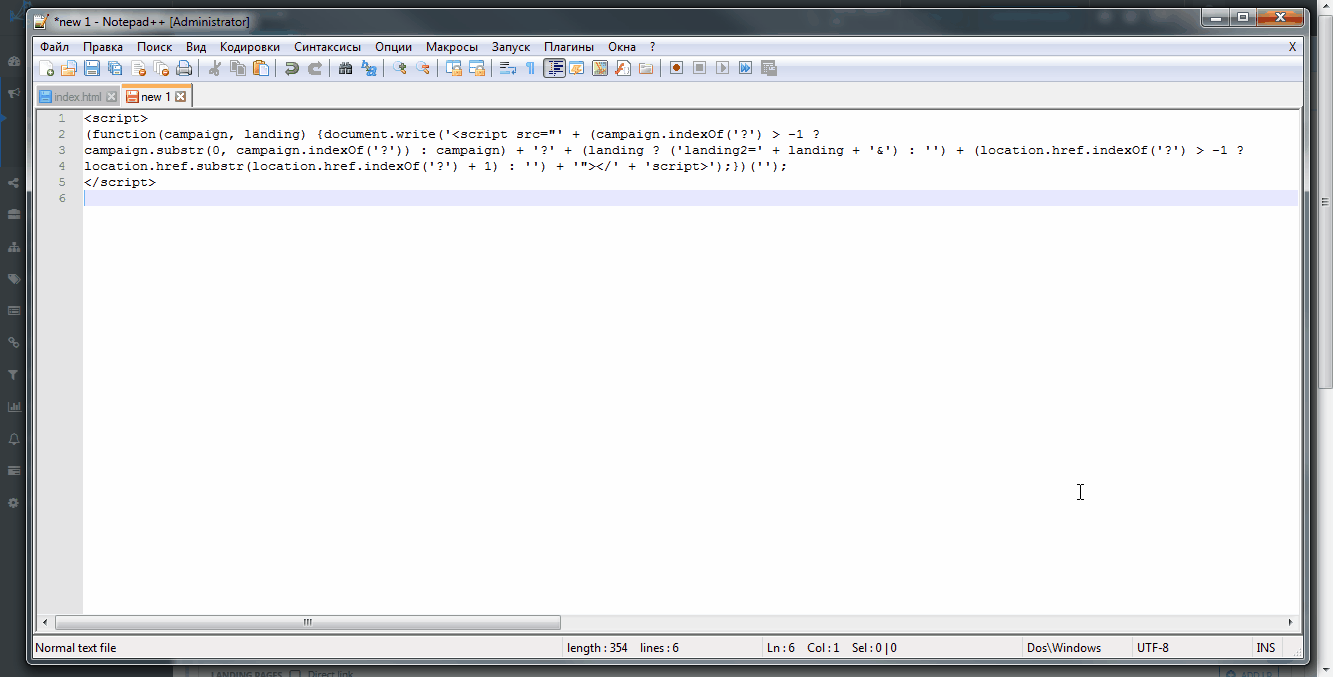
NOTE! If you use only one landing page, then you can add this landing ID to the script. This will protect you from possible loss of parameters and allow you to correctly track direct transfers to the landing page. ID is specified after campaign link, separated by a comma.
Example:

Insert this script into the HTML-code of your self-hosted landing page between. Note that the script is unique for each campaign.
4) Paste the click URL from AdsBridge on all buttons of your self-hosted landing page. Based on our previous example, it will look like this: http://woovk.adsbtrack.com/click.

5) After that, to the link of your self-hosted landing page, in which you have already inserted the script, add the landing2 = parameter and specify the landing page ID that is used in the AdsBridge campaign, the one we memorized on the first step.
As a result, the link will look like this: http://mylanding.com?landing2=100047.
Or, if you use Sub ID, the link will be as follows:
http://mylanding.com?token1={token1}&token2={token2}&landing2=100047.
NOTE! If you want to use several landing pages in one campaign on AdsBridge, let’s say for the split-testing purpose to determine the best LP, then you still use the same script, in which that previously corrected campaign link will be specified. However, you will already have two separate links, in which after landing2= parameter you will need to specify the ID of each landing page separately.
Example:
http://mylanding1.com?landing2=100047
http://mylanding2.com?landing2=111158
6) Once done, set the link on the side of a traffic source.
Wish you high conversions!
The AdsBridge Team
great thank you