This post we want to devote to the urgent topic of moving campaigns from trackers of our respected competitors to AdsBridge platform. We think over this article for a long time and due to the fact that our support team receives more and more similar questions, mainly related to interface, logic, glossaries differences, we decided to make a detailed comparison of AdsBridge and Voluum trackers. Thus, we want to make the process of transferring campaigns as easy as possible. Please follow the steps described below.
So, let review switching to AdsBridge tracking platform on Voluum’s example.
What do you need to set it up?
– Traffic source
– Affiliate network
– LPs
– Offers
Before we describe the process, let’s figure out: “Why to do this?” and “Is it worth the time spent?”
1. The AdsBridge performance is highly competitive with Voluum’s. It is an advanced tracker that combines a traffic distribution mechanism and a convenient multi-functional landing page builder (with HTML editor for experienced users and Visual editor for experienced users who don’t have sufficient knowledge in coding). And it’s well known that a properly set landing page can increase conversions up to 20-30%.
a)In addition to the editor, there is a library of popular LP templates for various verticals and types of traffic.
b) It is possible to use your own hosted landing pages easily linking them to AdsBridge.
2. AdsBridge provides its users with the most detailed and at the same time flexible in means of settings reporting system. You can view the stats by specific parameters of your traffic or in general.
3. Prices on AdsBridge are lower than on Voluum. Moreover, the limit of AdsBridge pricing plans is set in visits, not in the events like on Voluum, and that results in about 20% less cost with the same volume of traffic.
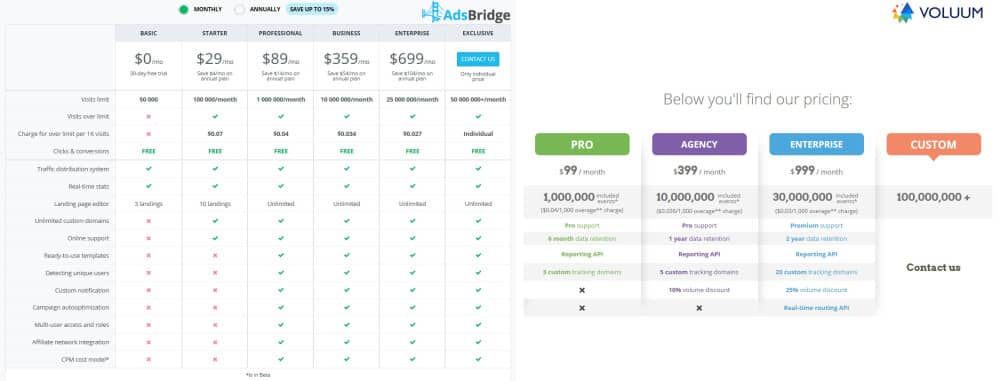
4. In order to test the AdsBridge system, a user is given a 30-day trial period or 50,000 visits. The advanced functionality is limited on this Basic plan but a user can use basic features (traffic distribution, tracking, reporting) until the limit of visits is reached. This is quite enough to check how the system works and make your choice in its favor.
5. AdsBridge has an adjusted Russian interface (not machine translation).
6. AdsBridge provides a quality e-mail support (and online chat support available for users with paid subscription) that is ready to answers your questions on campaign creation, reporting, additional features settings, etc.
7. AdsBridge provides users of Professional and higher pricing plans with the automatic campaign optimization feature that helps to increase revenue.
8. AdsBridge system works for large teams as it enables them to work under one account using the multi-access and roles feature (with the ability to create sub-accounts with individual permits at your discretion).
Now let’s proceed with the question of how to move a campaign from Voluum to AdsBridge. You will need to make six small steps that will guide you to success.
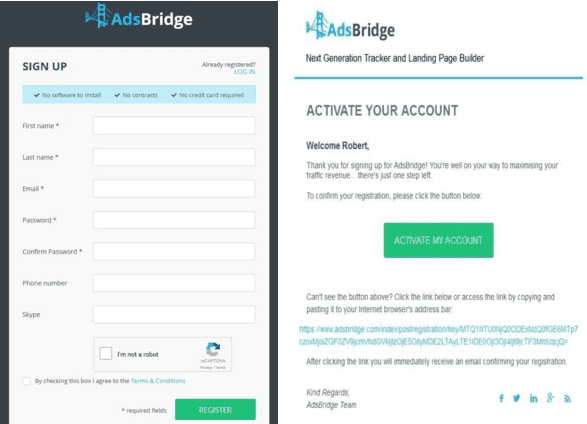
Step 1. Registration: The sign-up form and confirmation of registration via email.
Step 2. Traffic source. Creation:
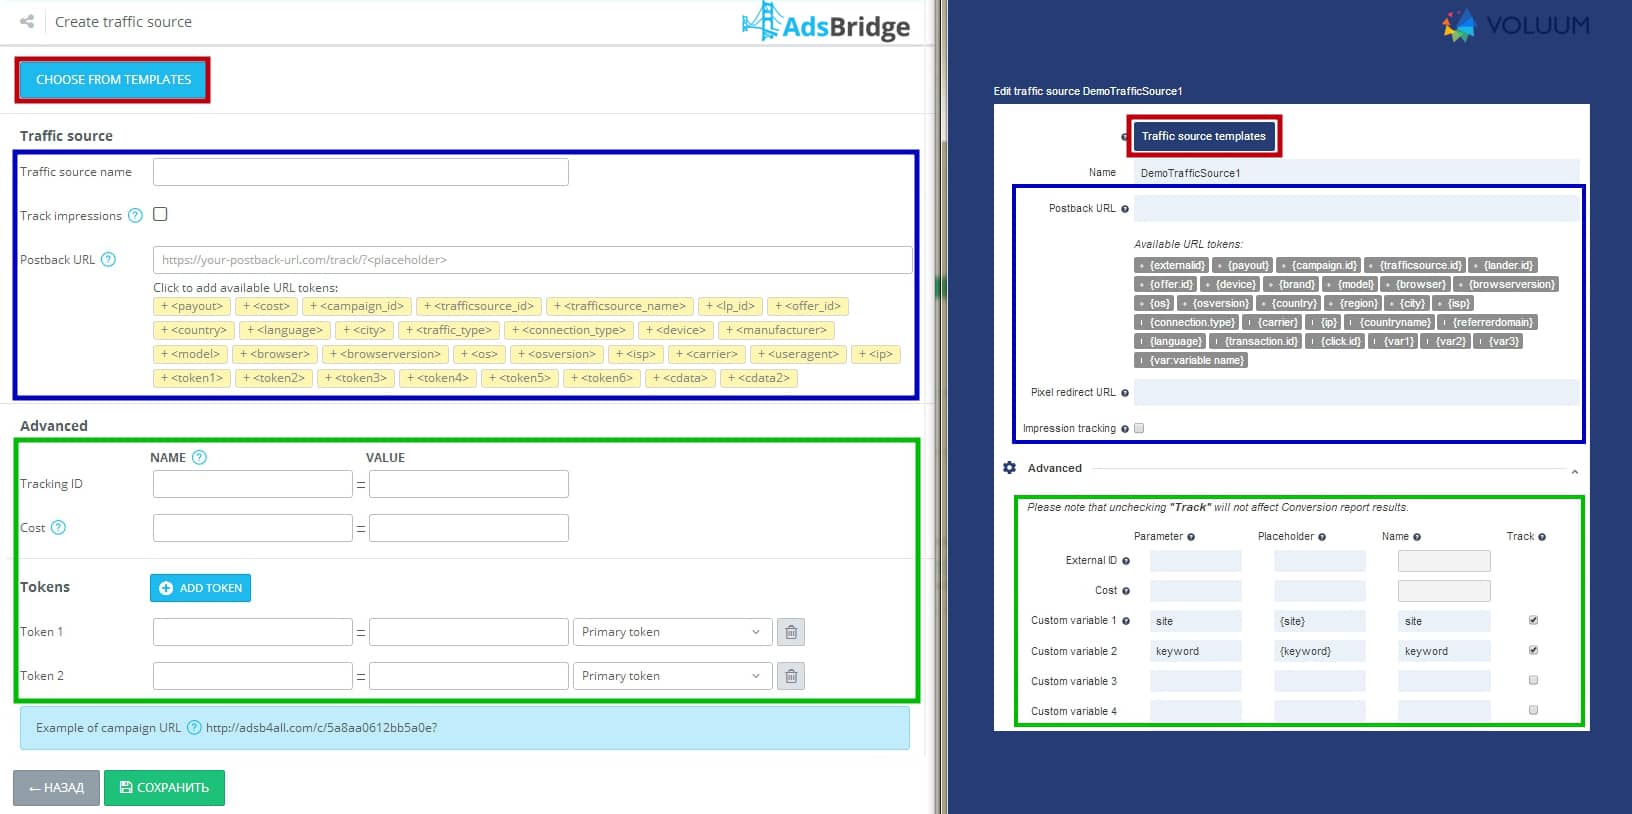
Red box – the use of preset traffic source templates (when selecting a template, the fields will be filled automatically).
Blue box – the basic traffic source data: name, track of impressions (if necessary), postback URL for passing conversions to traffic source.
Green box – Tracking Sub ID. The data will be automatically added into the campaign URL in which the traffic source was selected.
Note: don’t miss to indicate the Tracking Sub ID if you plan to pass conversion on a traffic source.
In case you have any question, you can use tips on the page to check the fields’ value or contact our support team. For your convenience, we recommend you to create the required set of traffic sources at once.
Traffic sources. Management:
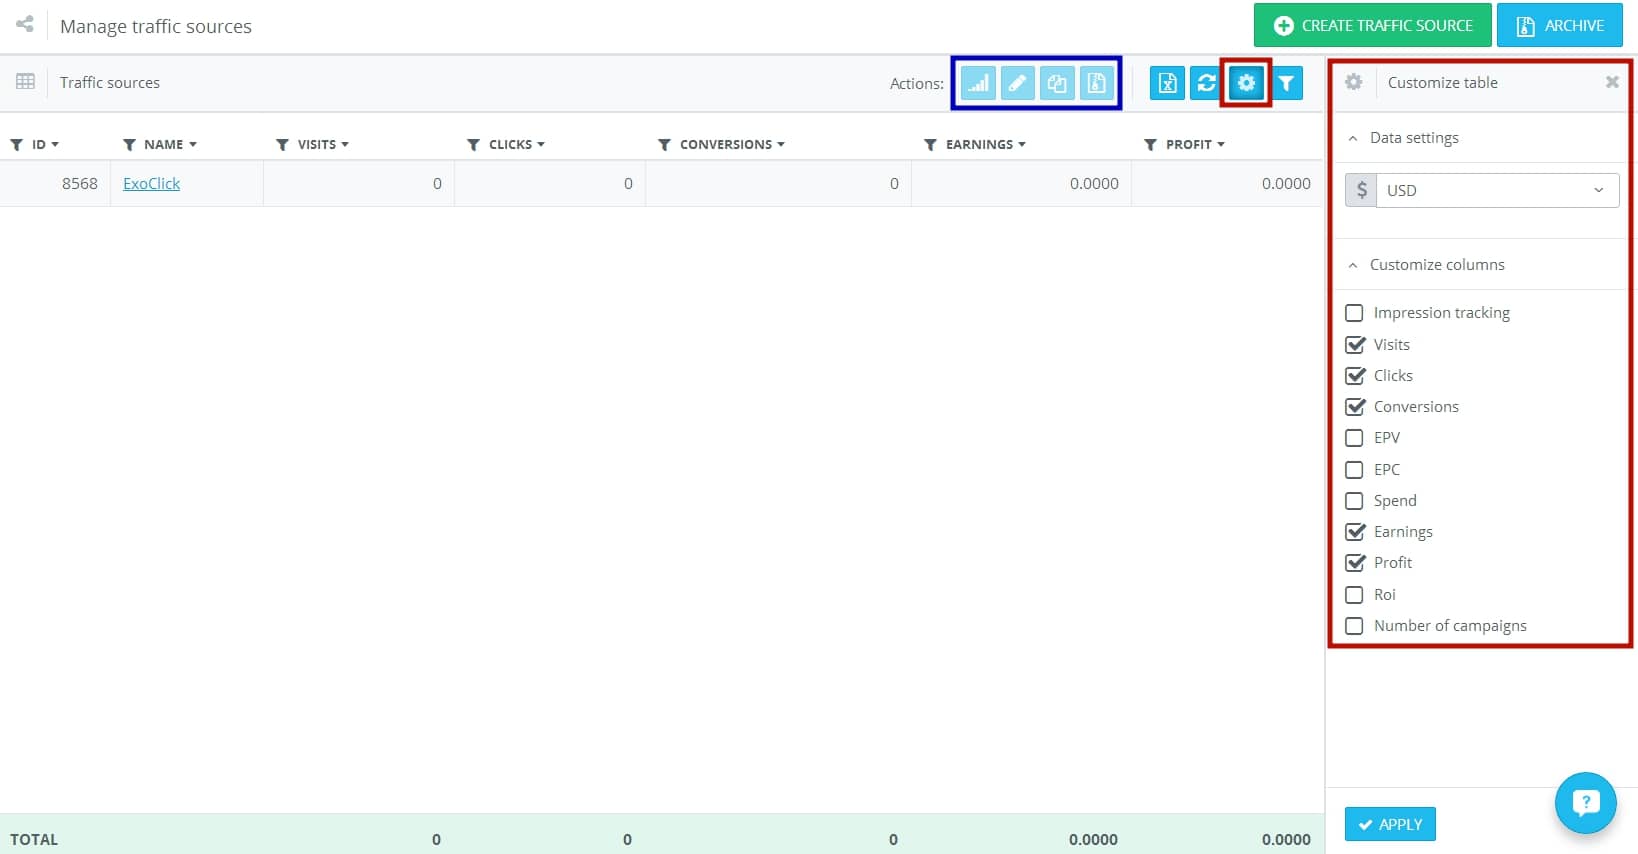
In the “Manage traffic sources” section you can:
Blue box – view statistics by a selected traffic source, edit, copy and move to archive previously created traffic sources.
Red box – specify the currency of financial data, adjust the set of columns for viewing the main indicators for this section.
Each column has a filter that helps to find a specific parameter or to select a set of parameters.
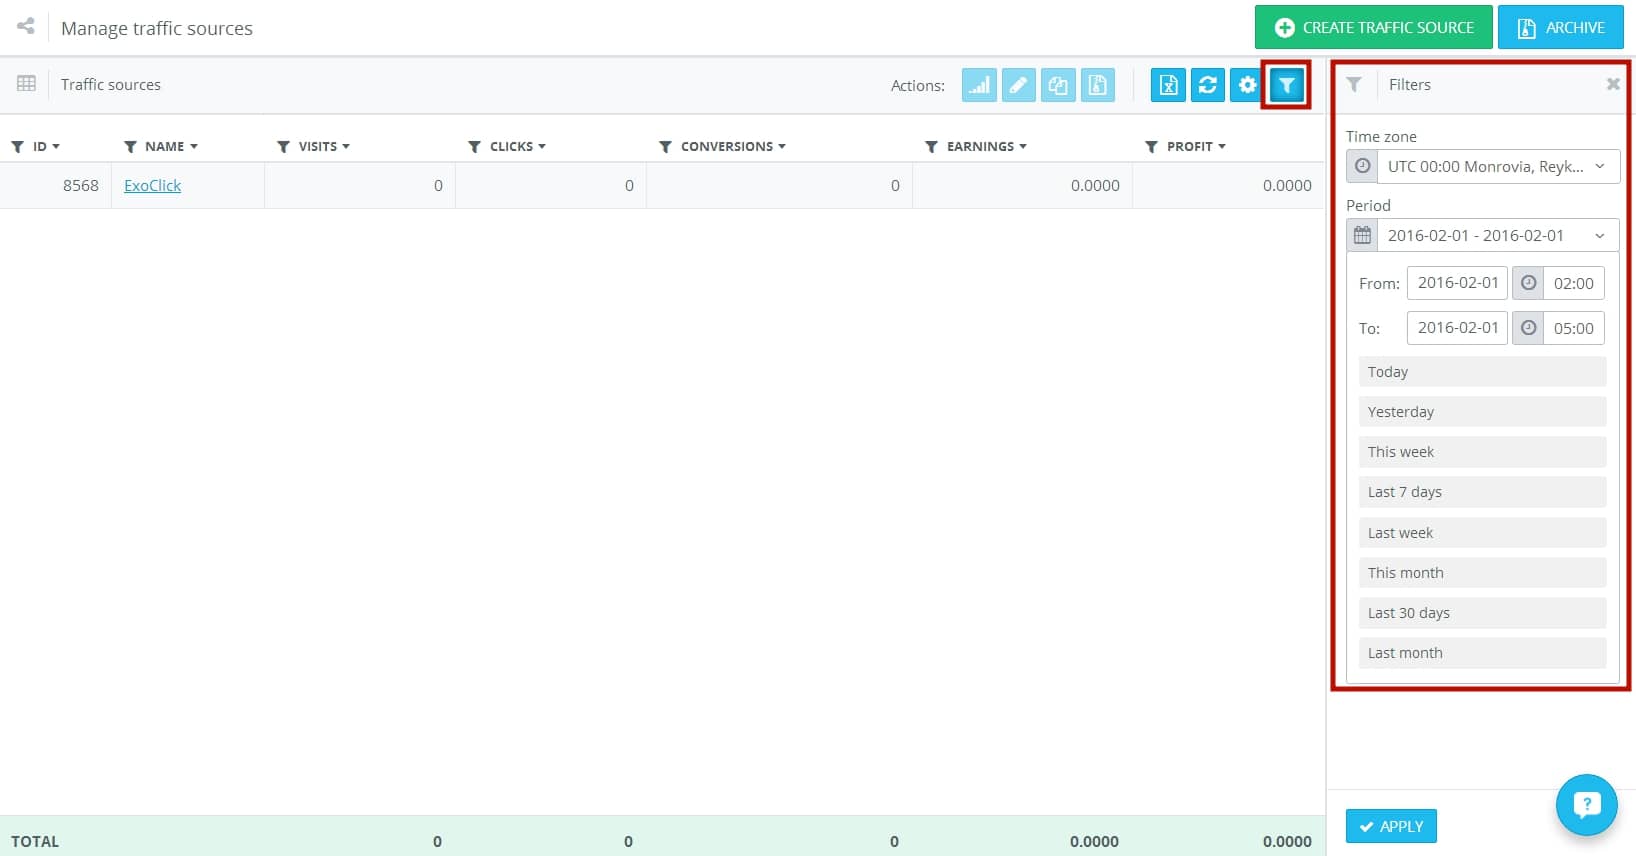
You can also set up filters to determine the time zone and time period within which you want to view the data.
Step 3. Affiliate network. Creation:
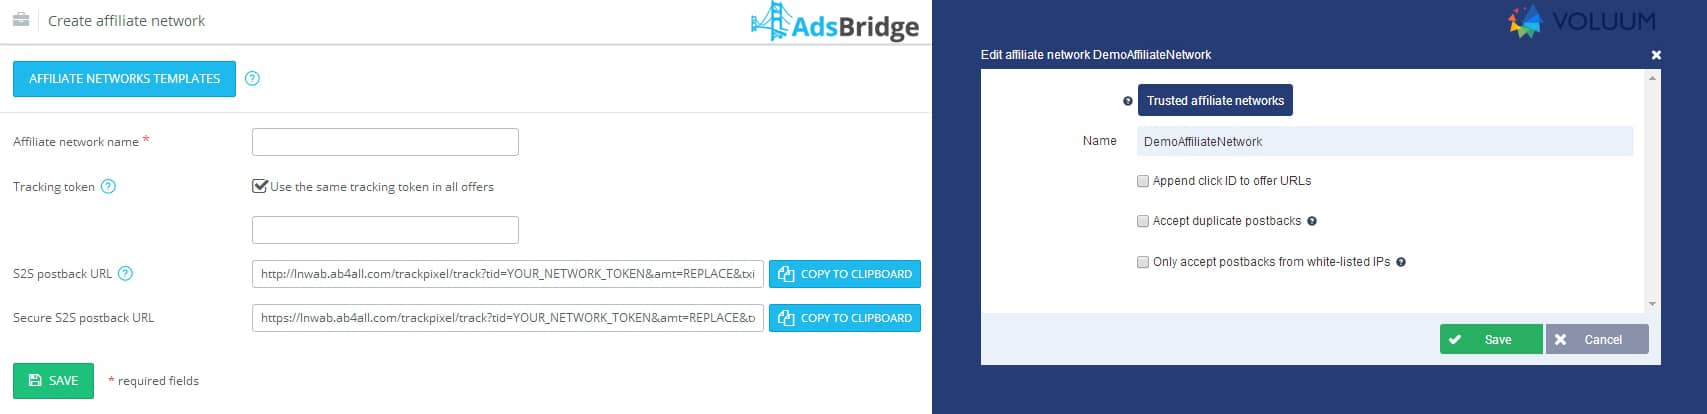
You can select a template from one of affiliate networks in the “Trusted affiliate networks” tab with the list of verified affiliate networks the cooperation with which will be secure. There are other affiliate networks integrated with AdsBridge system that enable you to link offers to AdsBridge in a few clicks. Read more about integrated affiliate networks here.
Indicate or copy the affiliate network name from Voluum’s account.
Here you can immediately determine the parameter which will be used to pass the click ID to affiliate network (in this case, you don’t have to specify it for each offer. You can simply select an affiliate network and this parameter name will be substituted automatically).
You will also see the postback URL for this affiliate network.
Note: If you use one of the templates, the displayed postback will be generated with the use of corresponding macros of an affiliate network.
In case you have any question, you can use tips on the page to check the fields’ value or contact our support team. For your convenience, we recommend you to create the required set of affiliate networks at once.
Affiliate network. Management:
In the “Manage affiliate network” section you can also adjust the set of columns. There is a filter in each column that can be used to find a specific parameter or select a set of parameters.
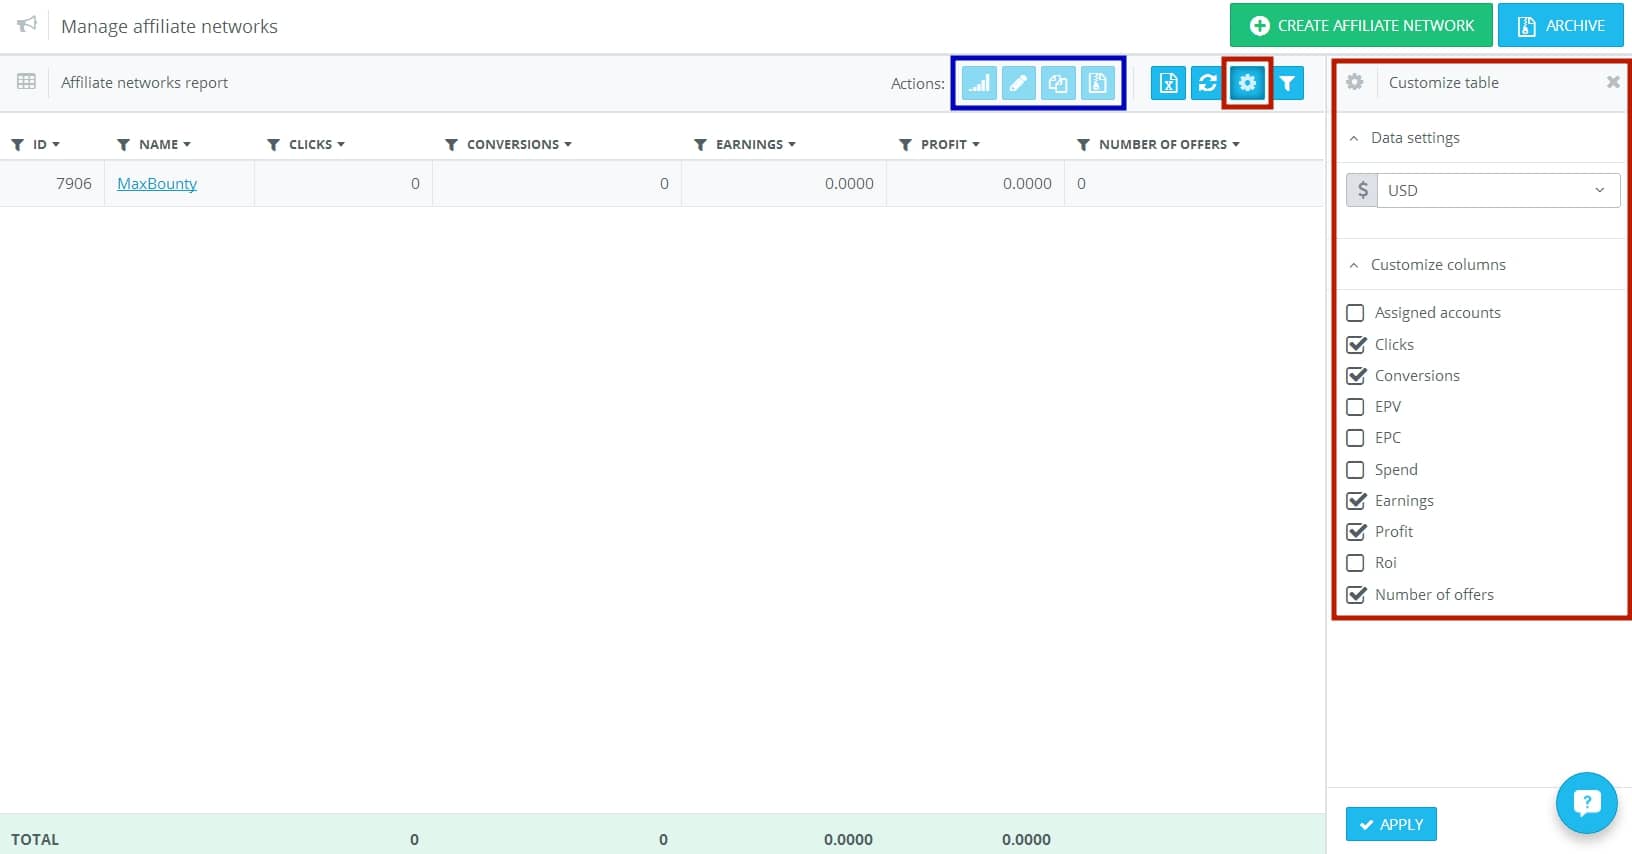
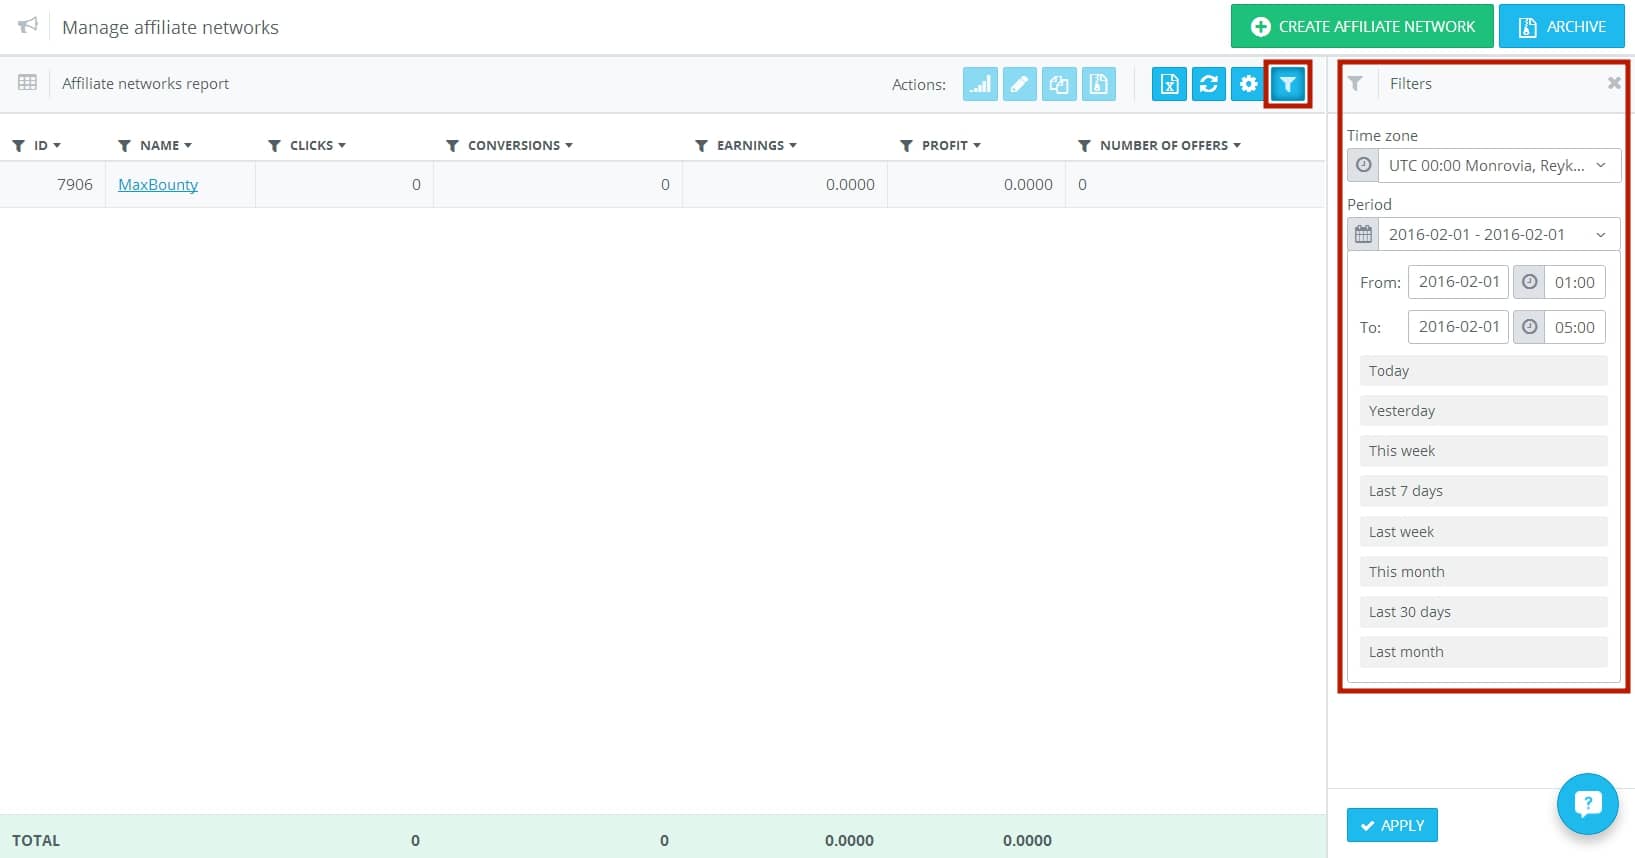
Note: The table adjustment is saved independently for each section, with the exception of the time zone and time period settings that are saved for all sections, i.e. it is necessary to set them only once.
Step 4. Offers. Creation:
There are two ways to create offers on AdsBridge:
The first one is when the needed offers belong to one of the integrated networks. All you need to do is to assign the affiliate network account in the “Affiliate network” section, and in the “Create offer section” mark the “Select assigned account’s offer” option.
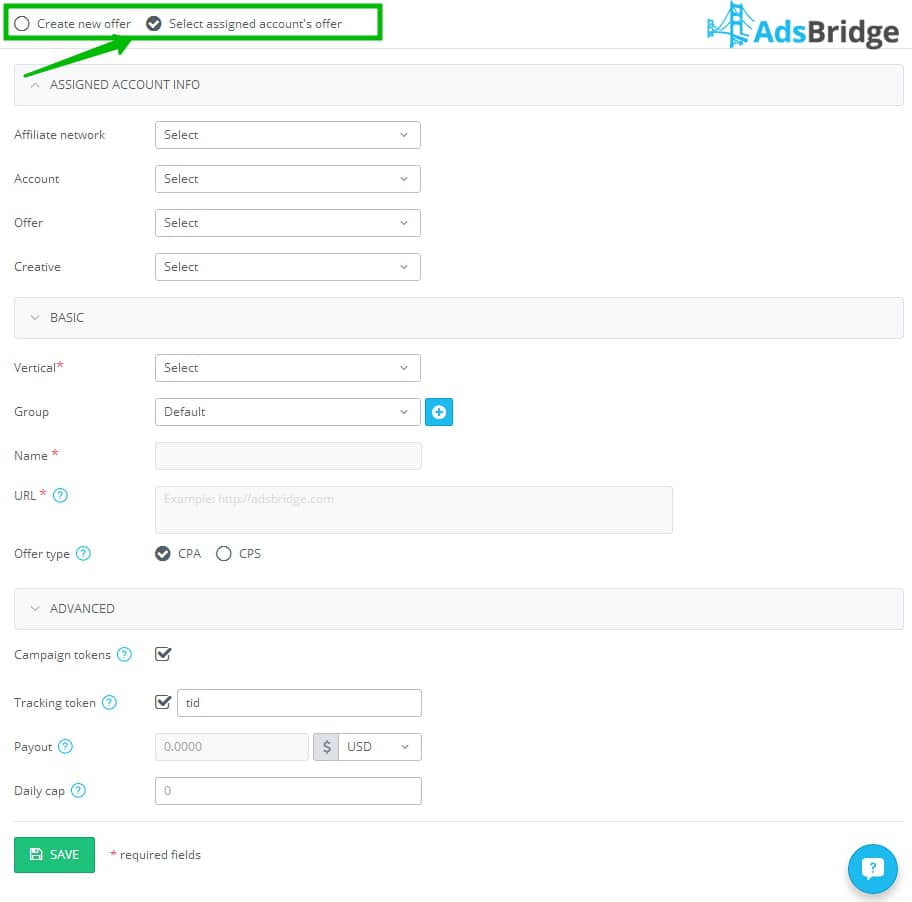
Then, it is necessary to select variants for the fields with drop-down lists, fill out some required parameters, and click the “Save” button. That’s it!
Repeat this setup process for each offer that you want to assign.
The second option is when you need to create an offer from the start or copy it from the Voluum account.

Green box – The basic information: name, vertical, URL and a set of placeholders to be added to the offer URL. With the help of placeholders, you can pass more information about traffic to an affiliate network, and form a non-standard format of URL (for example, if the incoming parameters are part of the offer URL).
The next field is the offer type: CPA or CPS. By selecting one of these variants you specify if additional conversions (sales, etc.) should be calculated.
Blue box – The advanced settings: selection of an affiliate network (if you specified the Tracking Sub ID when creating an affiliate network, this field will be filled automatically), payout and currency.
Note that the Tracking Sub ID parameter is a required field for tracking conversions. The system puts the name tid by default; its equivalent on Voluum is cid.
Note 1: The specified value will be used if a conversion value is not passed from the affiliate network.
Note 2: When passing the dynamic value of a payout from the affiliate network, only the numerical value will be counted, the currency will be used as specified in offer settings.
There are many offers with a set limit of conversions. Most affiliate networks solve the issue of an overage by automatically redirecting traffic to another offer of this affiliate network. However, the offer selected by the affiliate network does not always bring the desired result. In case the redirections are not set on the affiliate network’s side or you simply don’t use affiliate network but run traffic directly to the product, you won’t be paid for an overage. It is a lot better to stay in control and to select an offer for running traffic yourself when there is an overage in the limit of conversions.
AdsBridge has an additional setting option for this – the Daily Cap. You need to specify the limit and select an offer for redirecting traffic.
Once you complete the settings, your offer can be added to campaign. For your convenience, we recommend you to create the required set of offers at once.
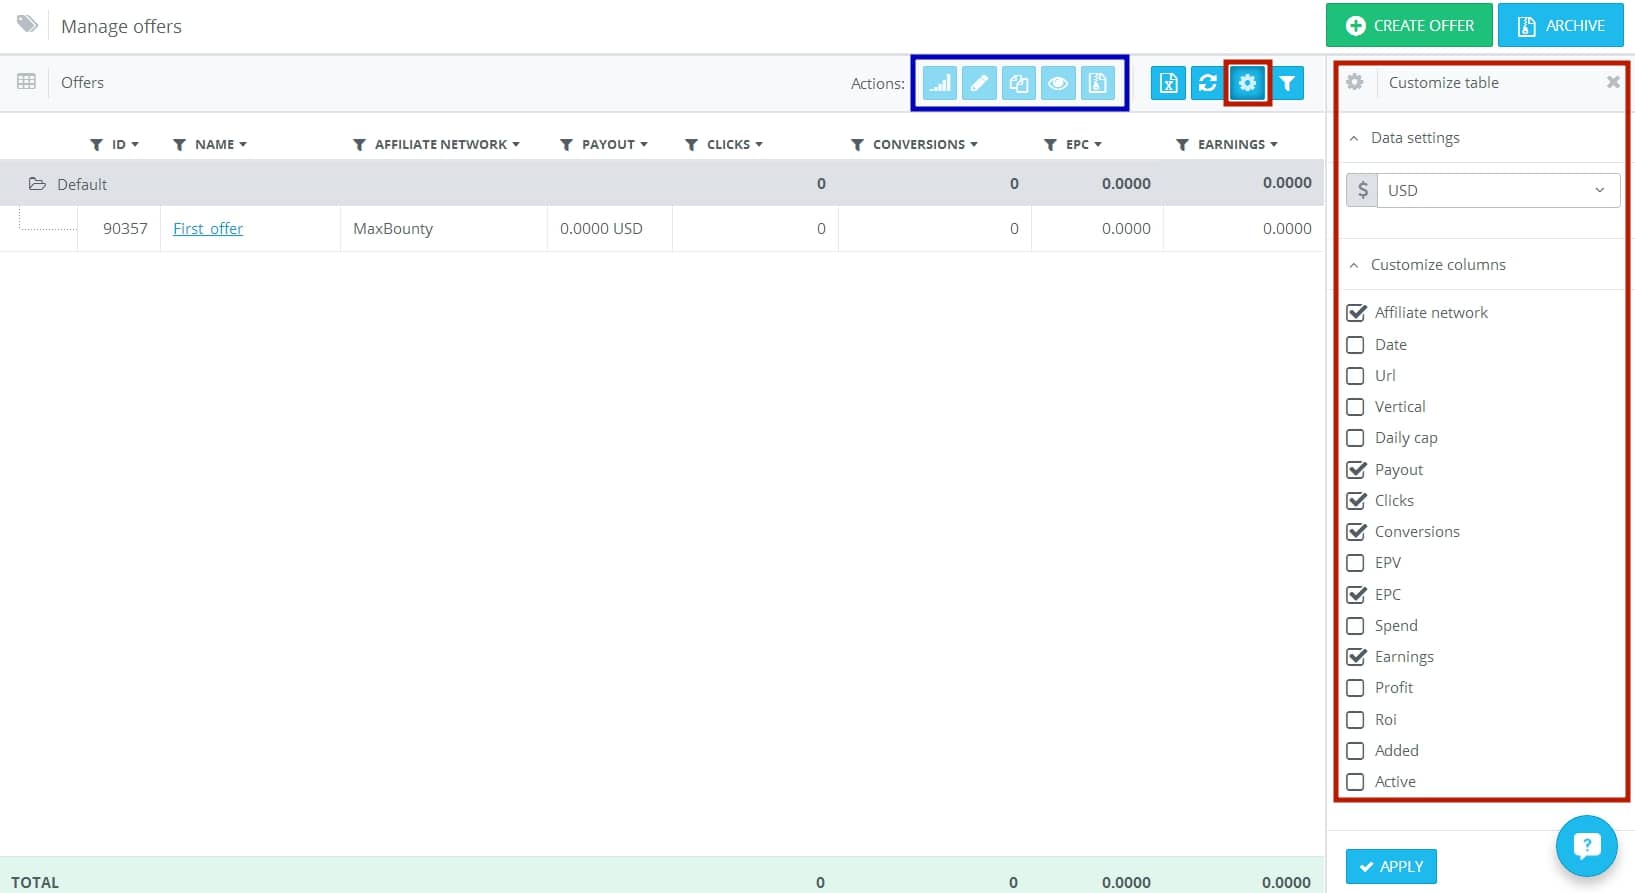
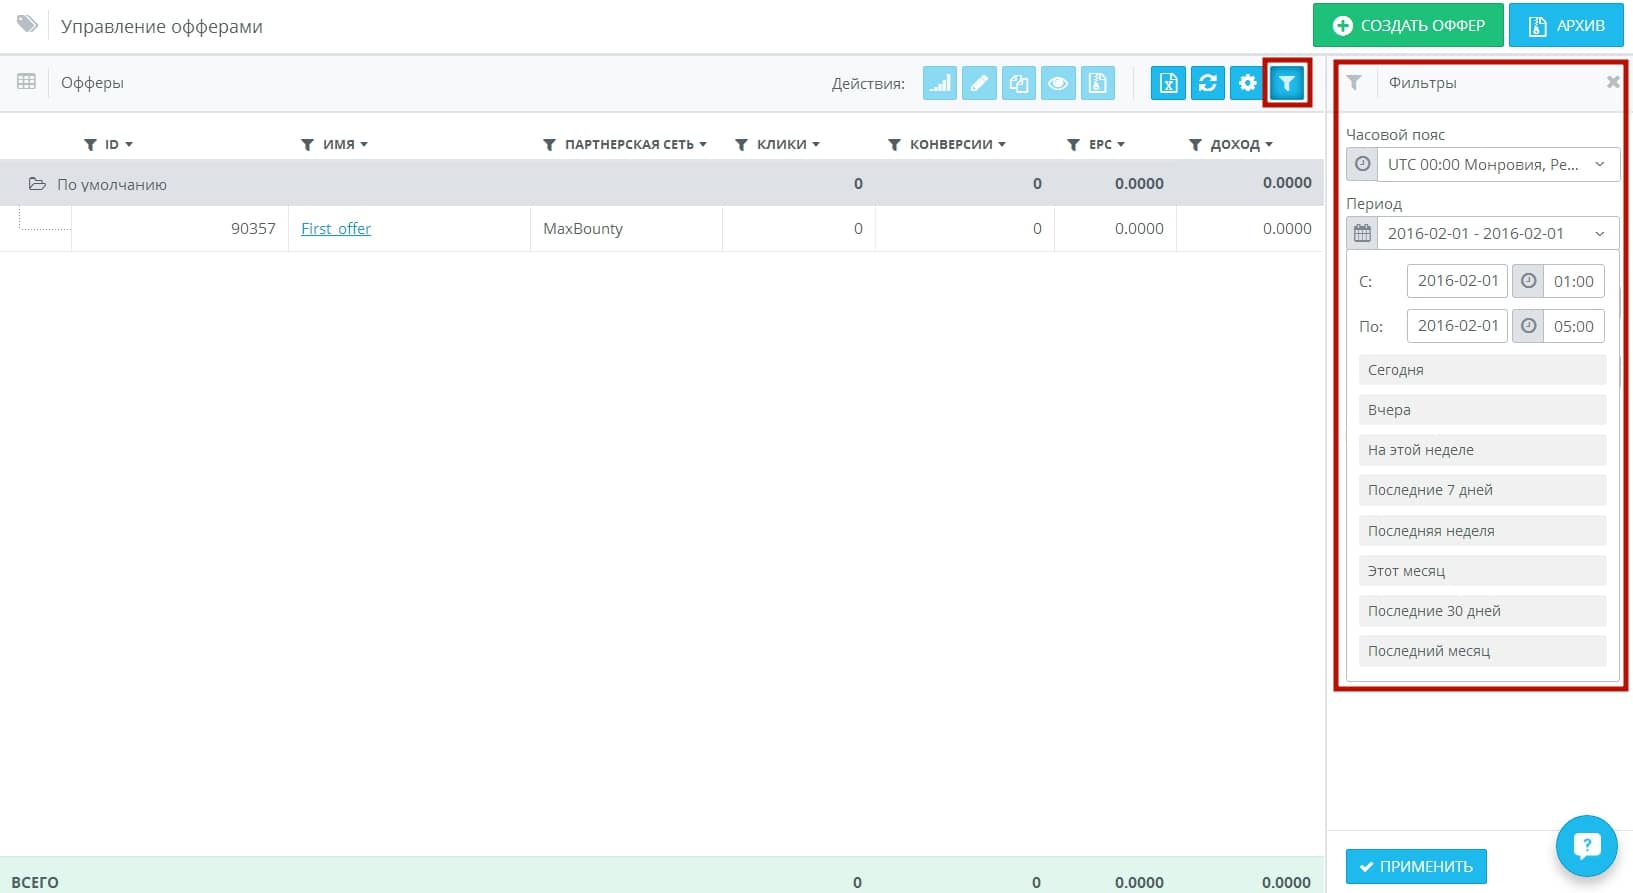
Offers. Management:
The “Manage offers” section is similar to the traffic sources and affiliate networks sections, only with its own set of columns. Keep in mind that each column has a filter which can help you to find a specific parameter or to choose a set of parameters.
Step 5. Landing page. Creation:
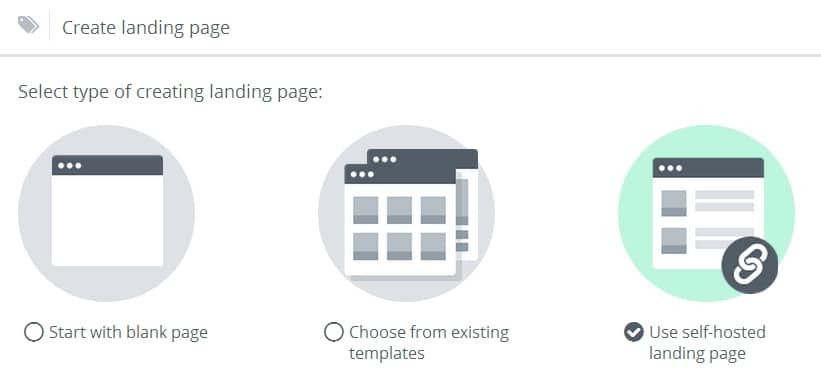
AdsBridge enables you to create and link your landing page. In order to link your landing page, it is necessary to fill out the following data:
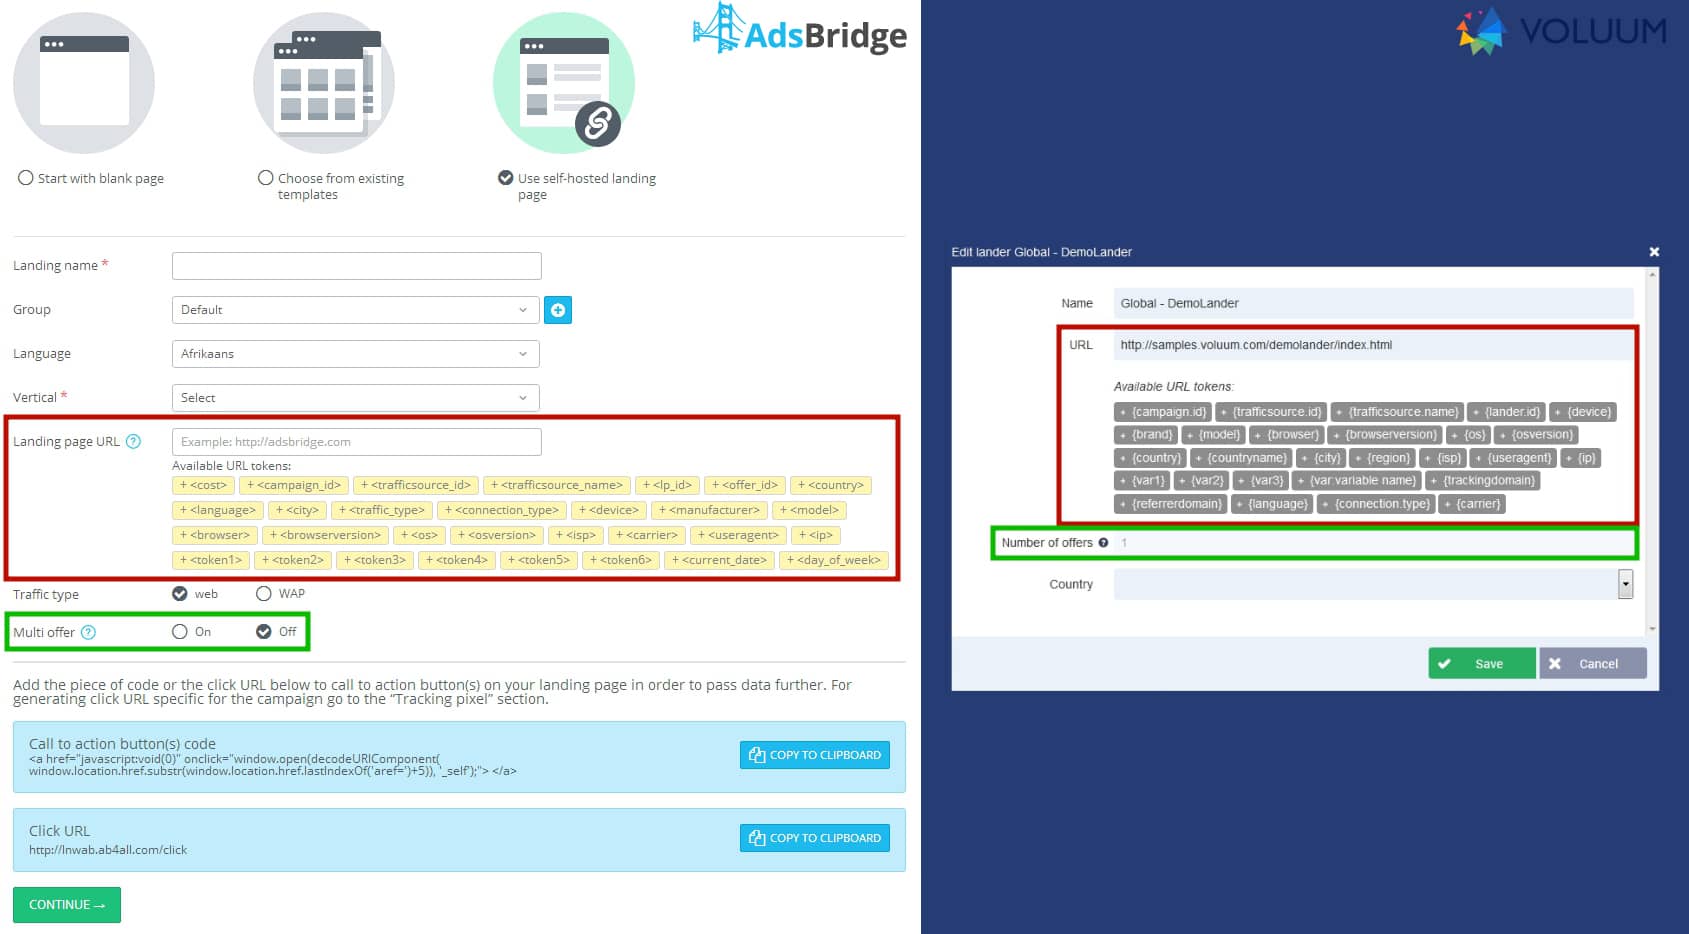
At first, it may seem that everything is easier on Voluum. But if to look closer, you’ll see that the page on AdsBridge is not complicated. It contains all the necessary information for setting up a lander and getting the code or URL for a correct redirect. You don’t have to go anywhere further or search code on the site — all information is there at hand.
Once you save the landing page settings, you can start using it for your campaigns.
In case you have any question, you can use tips on the page to check the fields’ value or contact our support team.
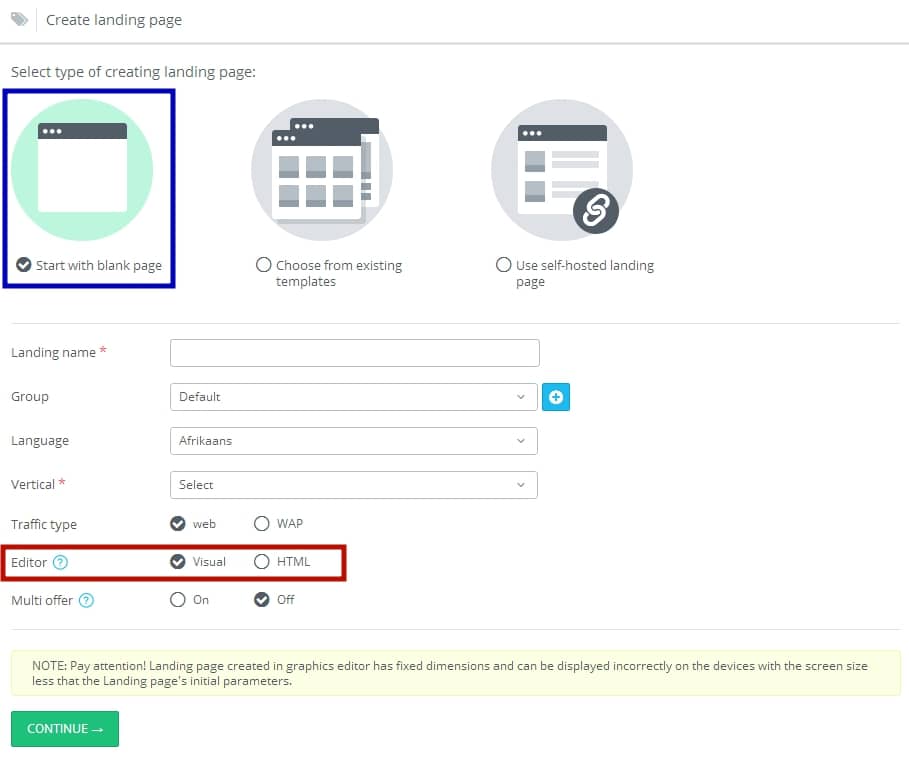
And now, something you won’t find on Voluum but what can come in handy — creation of a landing page in the built-in editor.
There are several ways of creating a landing page: you can create a lander from the start by using the editor you prefer (HTML or visual),
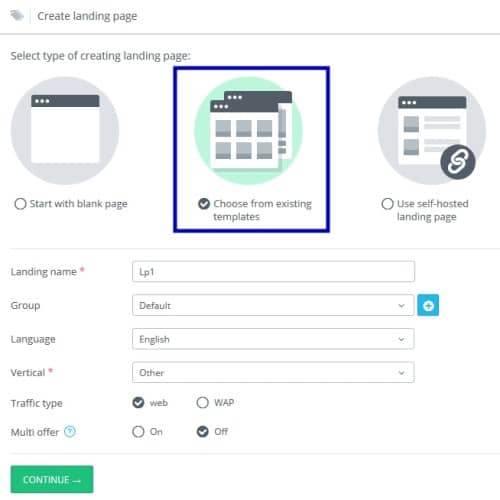
or you can use landing page templates (the templates are available in a visual editor only and for users with the PRO and higher subscription plans).
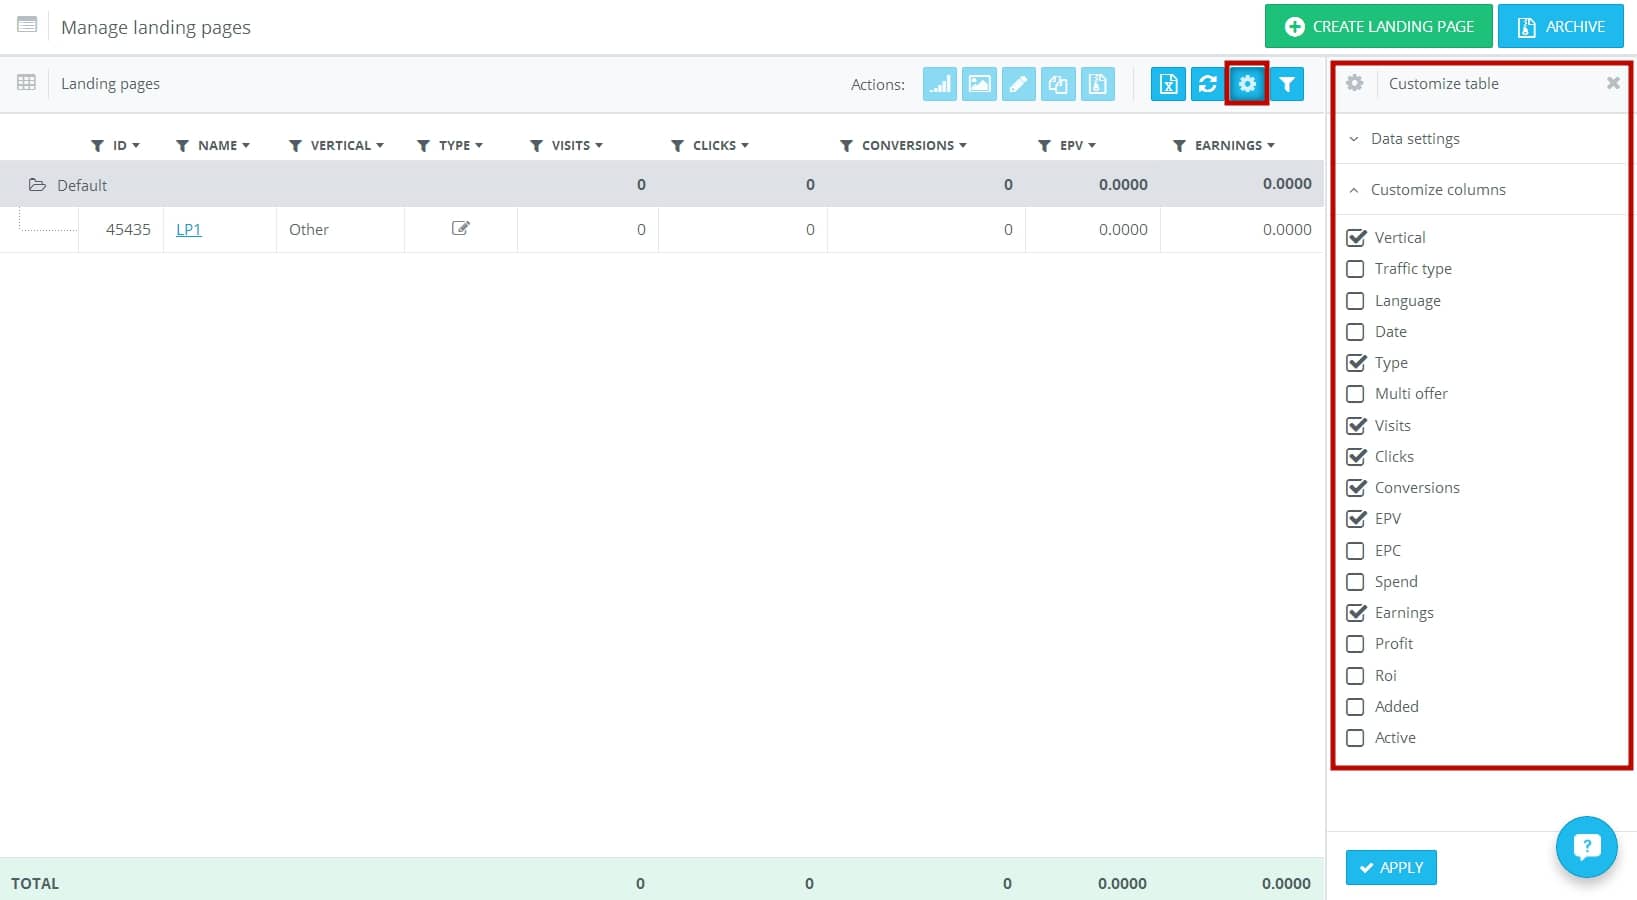
Landing page. Management:
From all previous management sections, this one differs only in a set of columns whereas filter settings remain the same. Each column has a filter that can help you to find a specific parameter or a set of parameters.
Step 6. Campaign. Creation.
The campaign setup consists of 6 blocks:
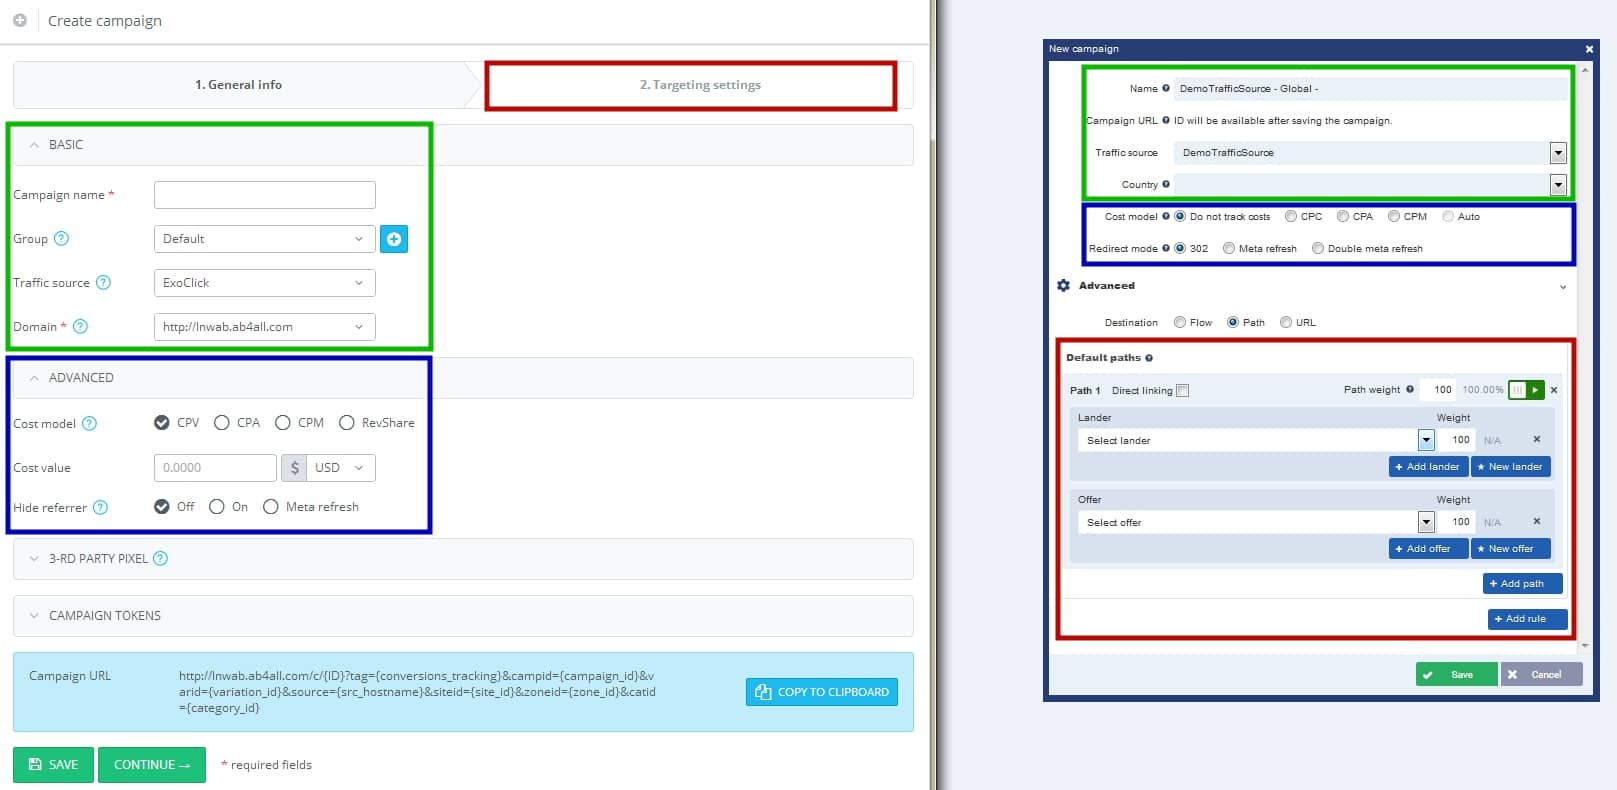
Green box – Block 1: The basic information (*required fields).
In comparison with Voluum AdsBridge might seem to have a more complicated setup but if to look closer, you’ll see that our system provides additional options:
– when setting up a campaign you can create a group or combine campaigns (later on this simplifies the campaign search and enables you to view statistics by group);
– selection of a redirect domain for each specific campaign. By default, each account has a unique subdomain (you can link your own one or buy a new domain in the AdsBridge interface which will be set for your account so that you can use it for specific campaigns). Read more details here. (https://www.adsbridge.com/guide/tracking-domains/ )
Blue box – Block 2: The advanced settings.
The enabling and disabling of a Hide referrer option and cost model setup:
CPV – payment for the visit,
CPA – payment in case of conversion,
CPM – payment for 1,000 visits,
RevShare – the share payment from the revenue. You specify the percentage of revenue that you give to traffic source. Our system calculates costs, and if necessary, passes the calculated value to the traffic source by means of 3d party pixel.
Here you also can set up the conversion pass to the 3d party (i.e. to a traffic source).
Red box – Block 3: The distribution rules setup.
On AdsBridge this is put on a separate page which allows you to comfortably set up the complicated schemes of distribution.
The distribution can be done by a wide set of incoming traffic parameters: from global, such as country, traffic type, OS to more specific ones like operator, user agent, device model, etc.
There should not be a situation that you can’t create the needed rule when moving campaigns from Voluum.
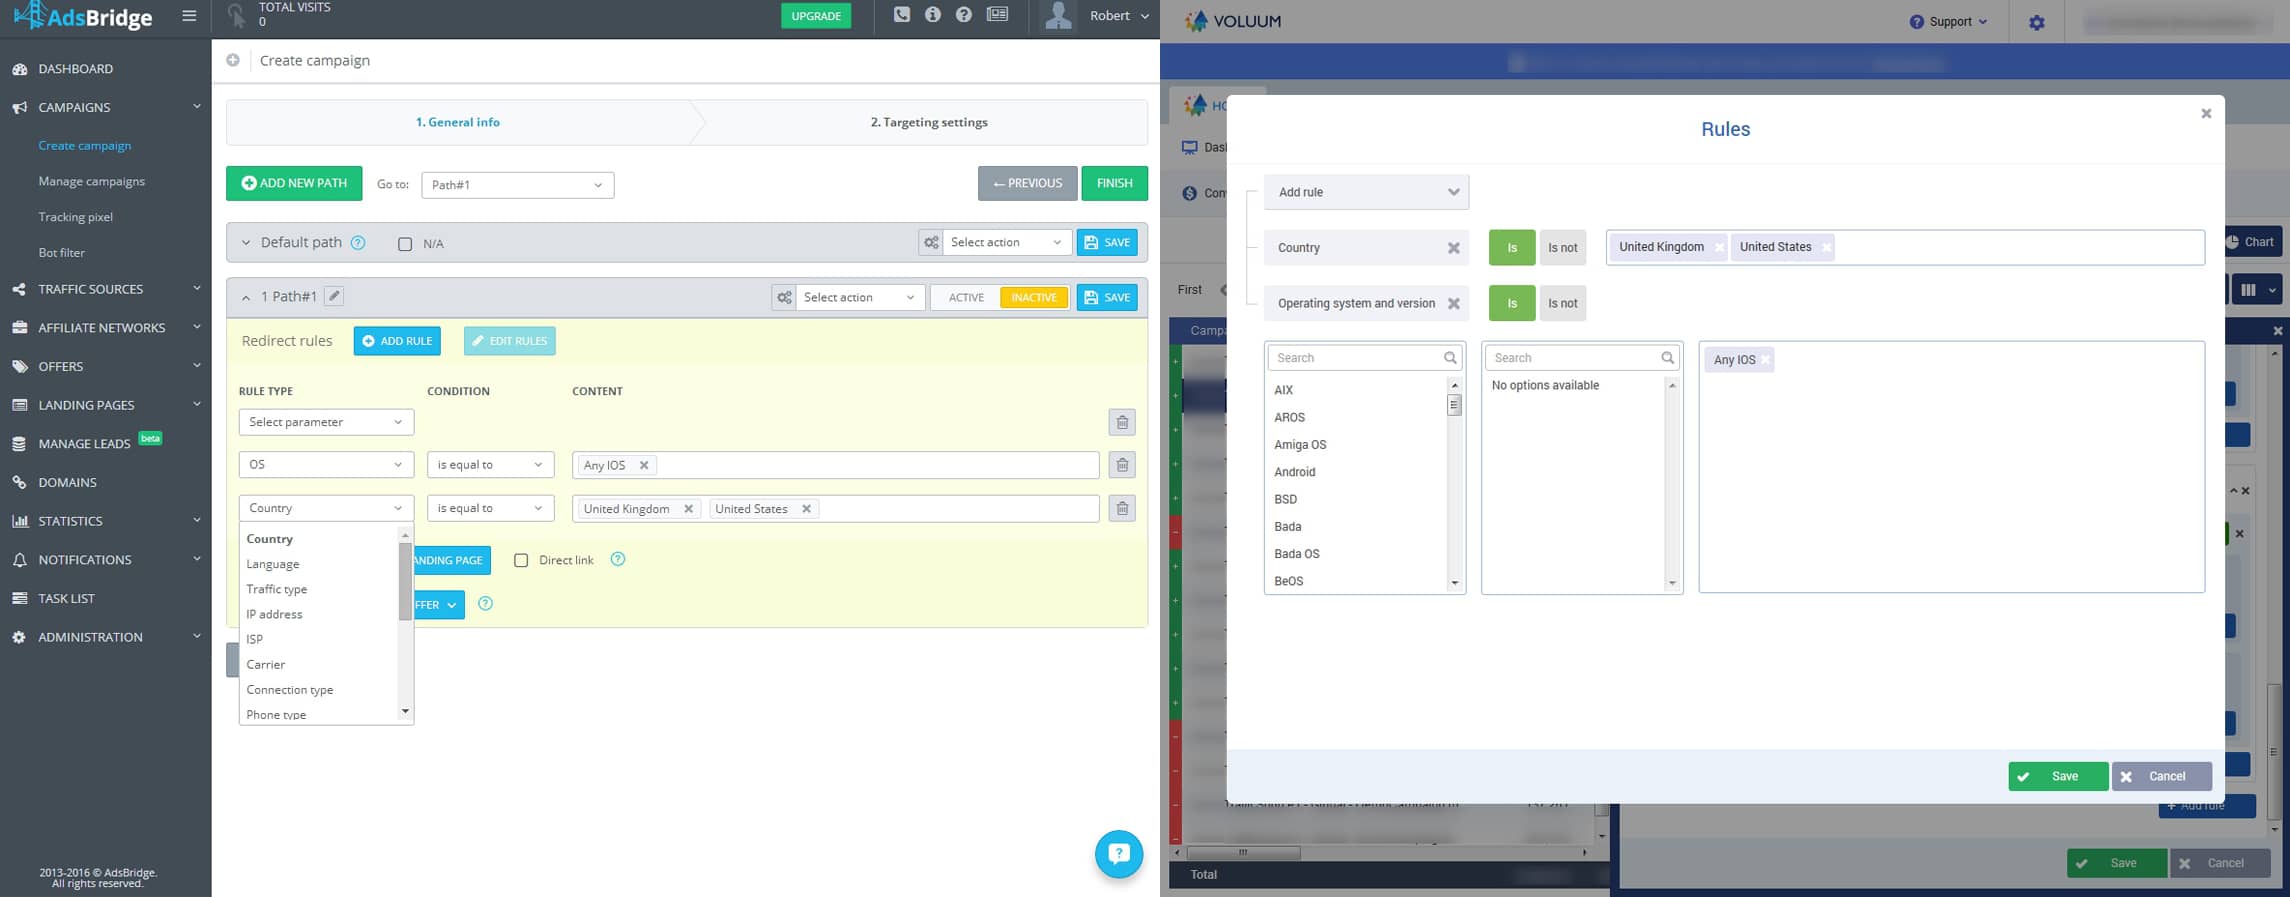
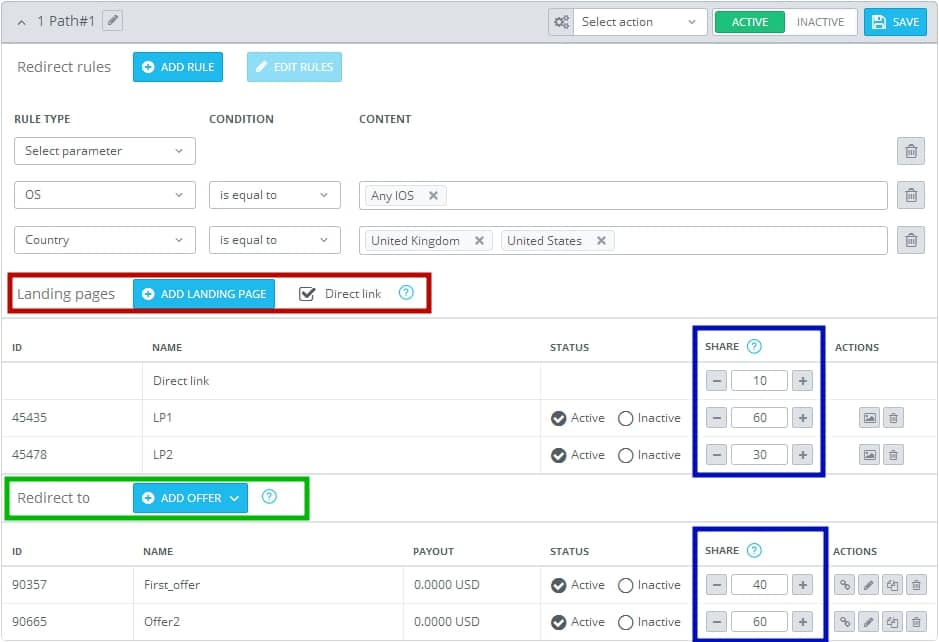
After you create a distribution rule, it is necessary to activate it, select an appropriate landing page, offers, and set up a split testing between them and save campaign. That’s it!
You can consult the user guide for campaign creation and setup here.
Campaign. In addition:
At the very beginning, we’ve mentioned the automatic campaign optimization. It is an analytical tool that on the basis of campaign results distributes the percentage of the traffic received by each element (landing, offer) depending on their profitability.
This feature is available to users with a PRO and higher pricing plans.
Note: by using relevant landing pages and offers, and also sufficient traffic volume for analytics, the campaign performance will be increased by 25-30%.
To learn more about this feature, go here.
Campaign. Management:
In the “Manage campaign” section just like in other management sections, there is a filter in each column that can help you to find a specific parameter or choose a set of parameters.
Once you finish the move or creation of campaigns, you will only need to place URLs of your new campaigns on your traffic sources and let AdsBridge do the work.
In case you have any question, you can use tips on the page or contact our support team.